No-Bake Birthday Cake Cookie Truffles
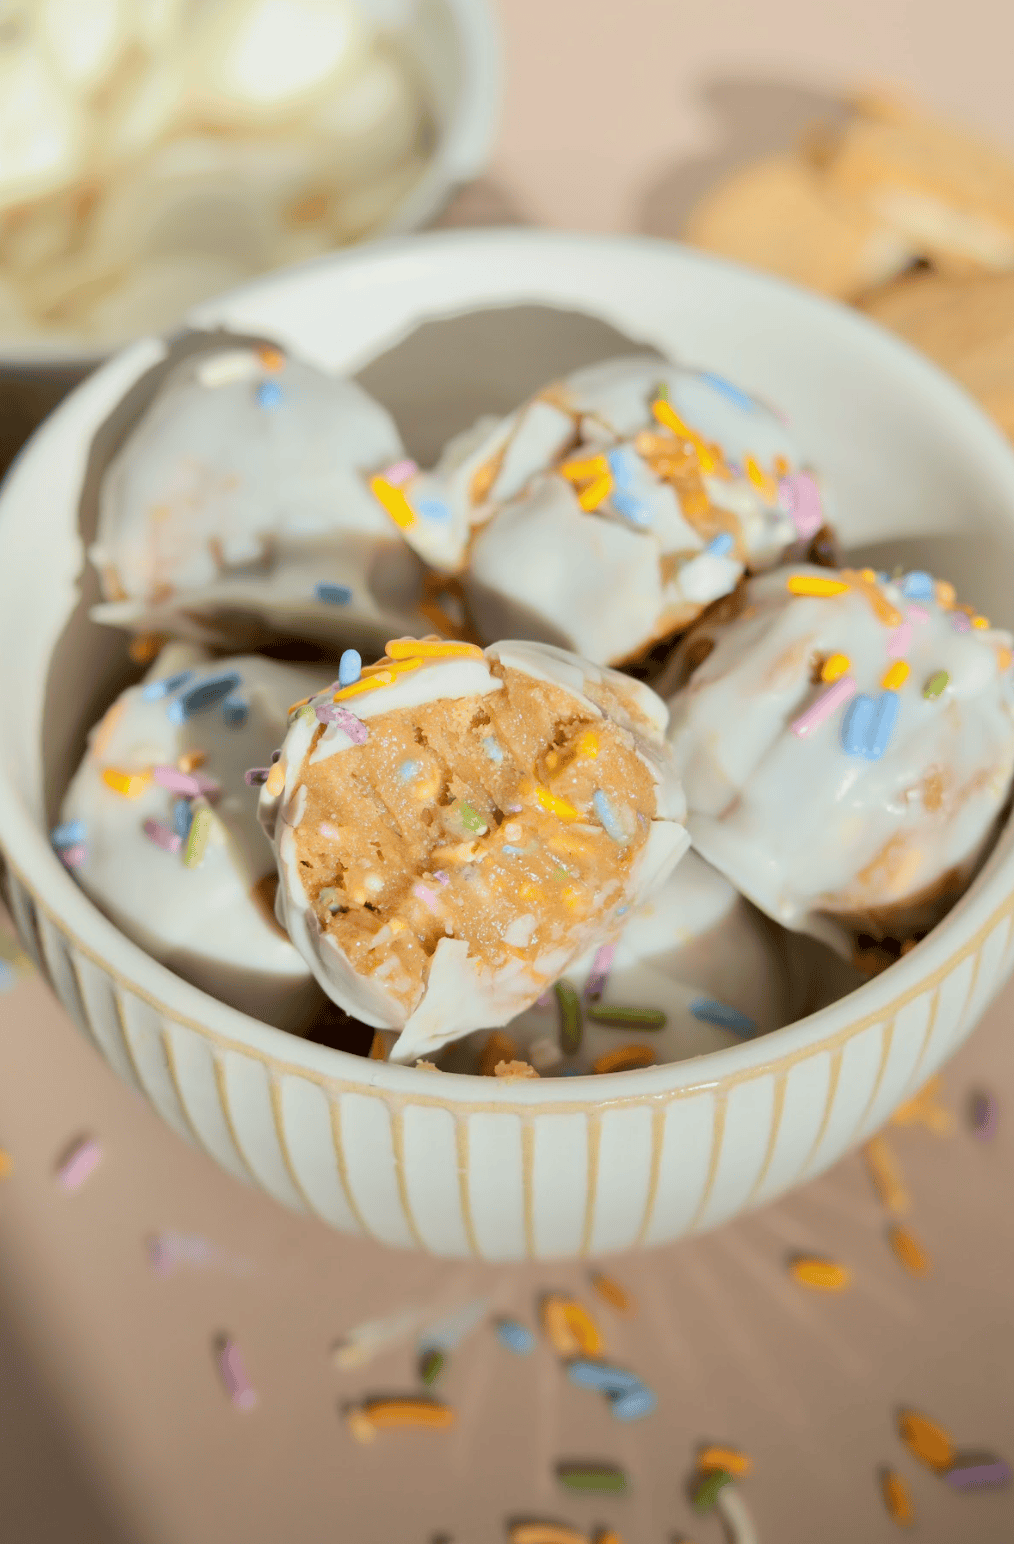
If you need a dessert that looks like it took serious effort but actually comes together in under 30 minutes with no oven required, these no-bake birthday cake cookie truffles are exactly that. Crushed Goodie Girl Birthday Cake Sandwich Cookies blended with coconut cream and vanilla, rolled into bite-sized balls, dipped in silky white chocolate, and finished with a shower of sprinkles or crushed cookie crumbs. They’re festive, fun, completely gluten-free, and dairy-free without tasting like either of those things.
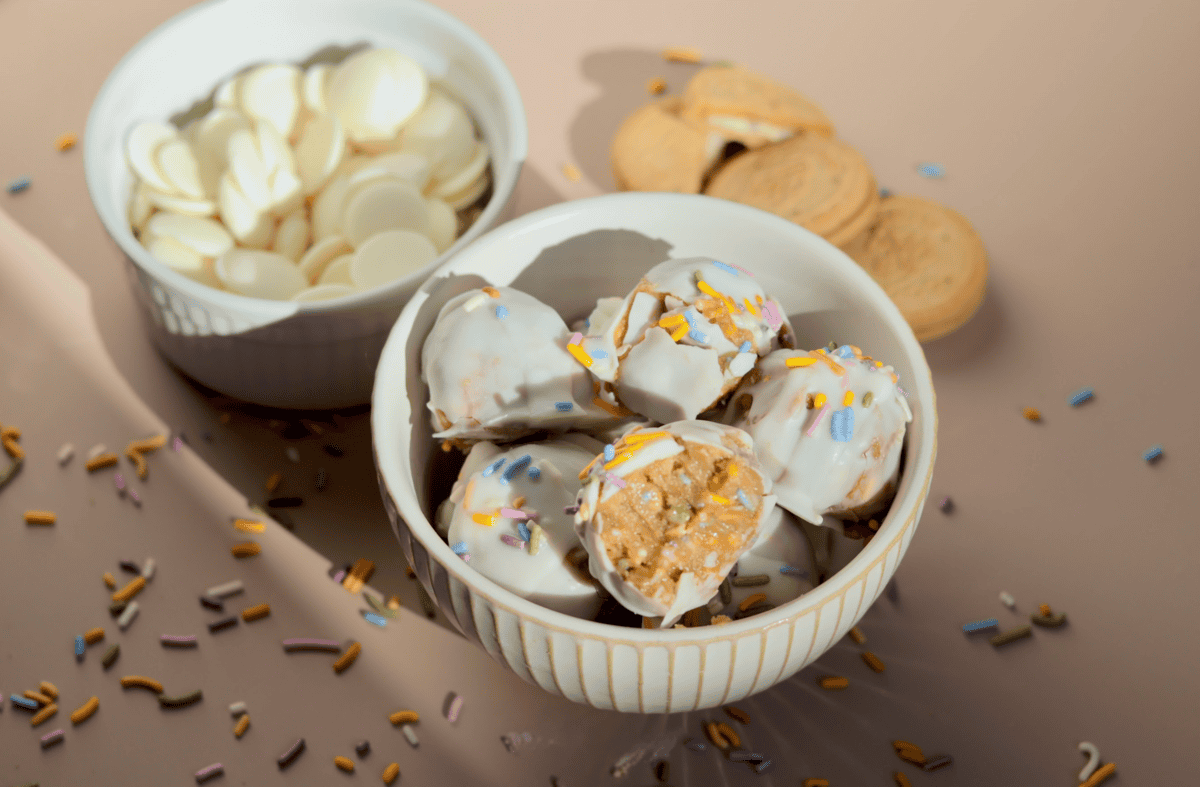
The magic is in the cookie itself. Goodie Girl Birthday Cake Sandwich Cookies have that unmistakable funfetti flavor built right in, which means the truffles taste like birthday cake without any cake baking required. The coconut cream binds everything into a soft, scoopable dough that firms up beautifully after a quick trip to the freezer and holds its shape perfectly through the dipping process. These are the kind of treat that disappears off the plate before you can even set it down.
Ingredients Needed to Make Birthday Cake Cookie Truffles
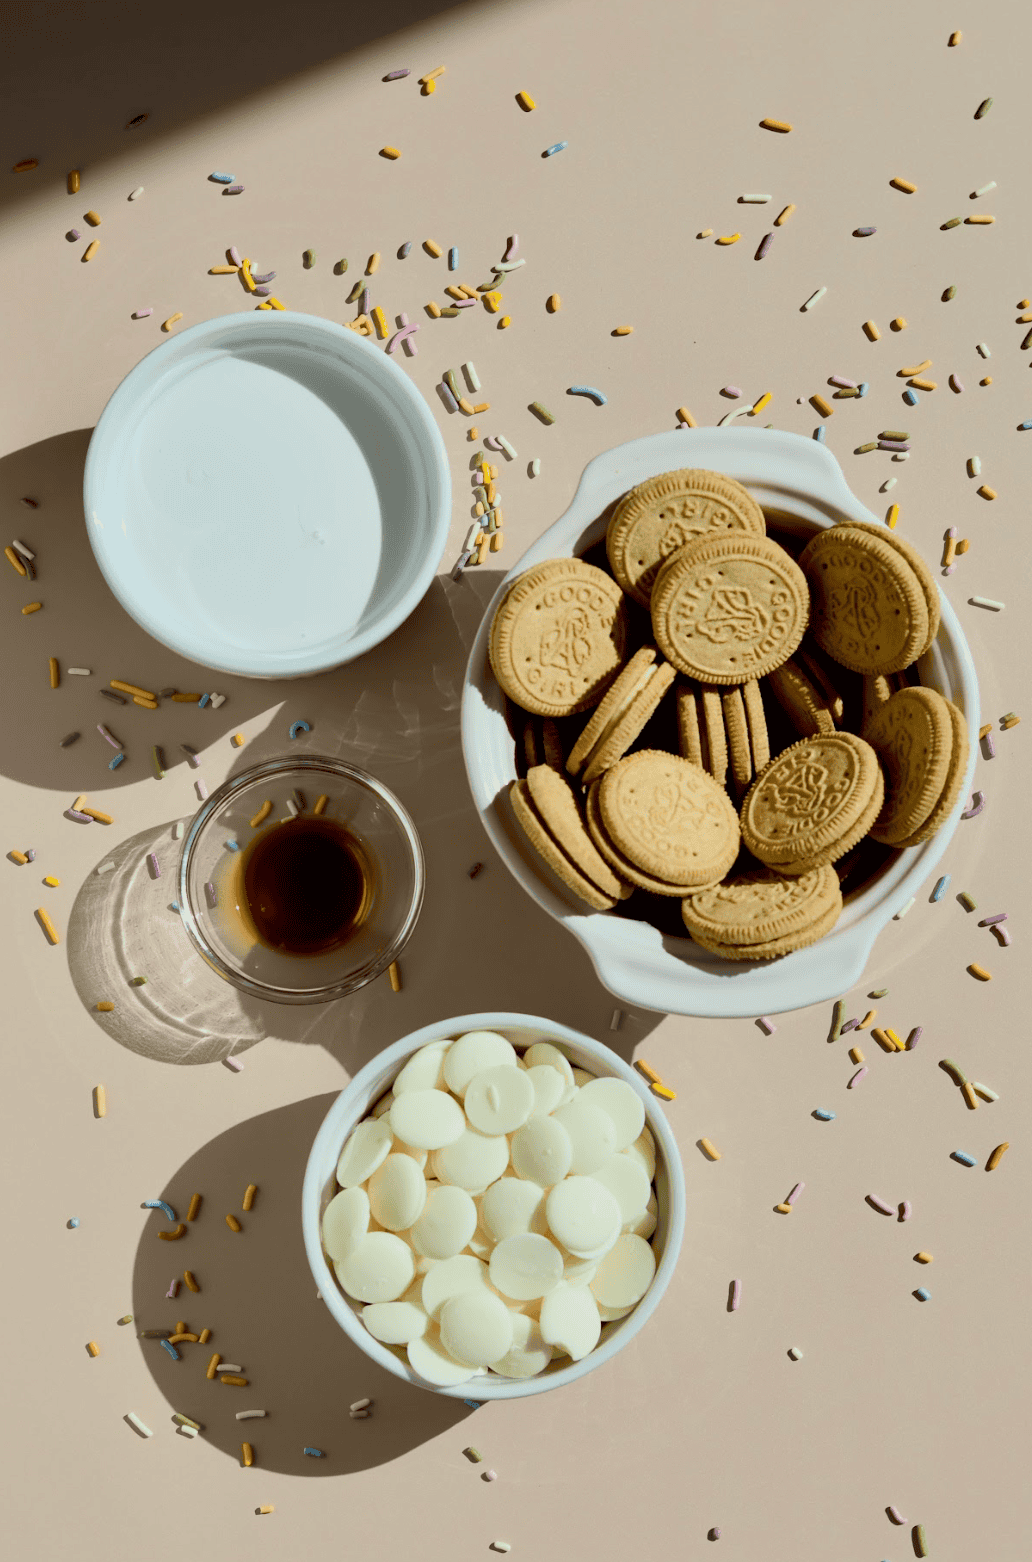
A short ingredient list that punches well above its weight. Here’s everything you need:
The Truffle Filling
- Goodie Girl Birthday Cake Sandwich Cookies, gluten-free (one full package)
- Coconut cream (or your favorite dairy-free cream substitute)
- Vanilla extract
The Coating and Garnish
- White chocolate chips or white melting wafers (melting wafers are easier to work with and set with a smoother finish)
- Crushed Birthday Cake cookies or colorful sprinkles, for garnish
How to Make No-Bake Birthday Cake Cookie Truffles
No oven, no mixer, just a food processor and a bowl. Here’s how it comes together.
Step 1: Crush the Cookies
Add the entire package of Goodie Girl Birthday Cake Sandwich Cookies to a food processor and pulse until they resemble fine, even crumbs with no large chunks remaining. You want a sandy, uniform texture so the truffles roll smoothly and hold together without crumbling. No food processor? Place the cookies in a large zip-lock bag and crush them with a rolling pin until finely ground.


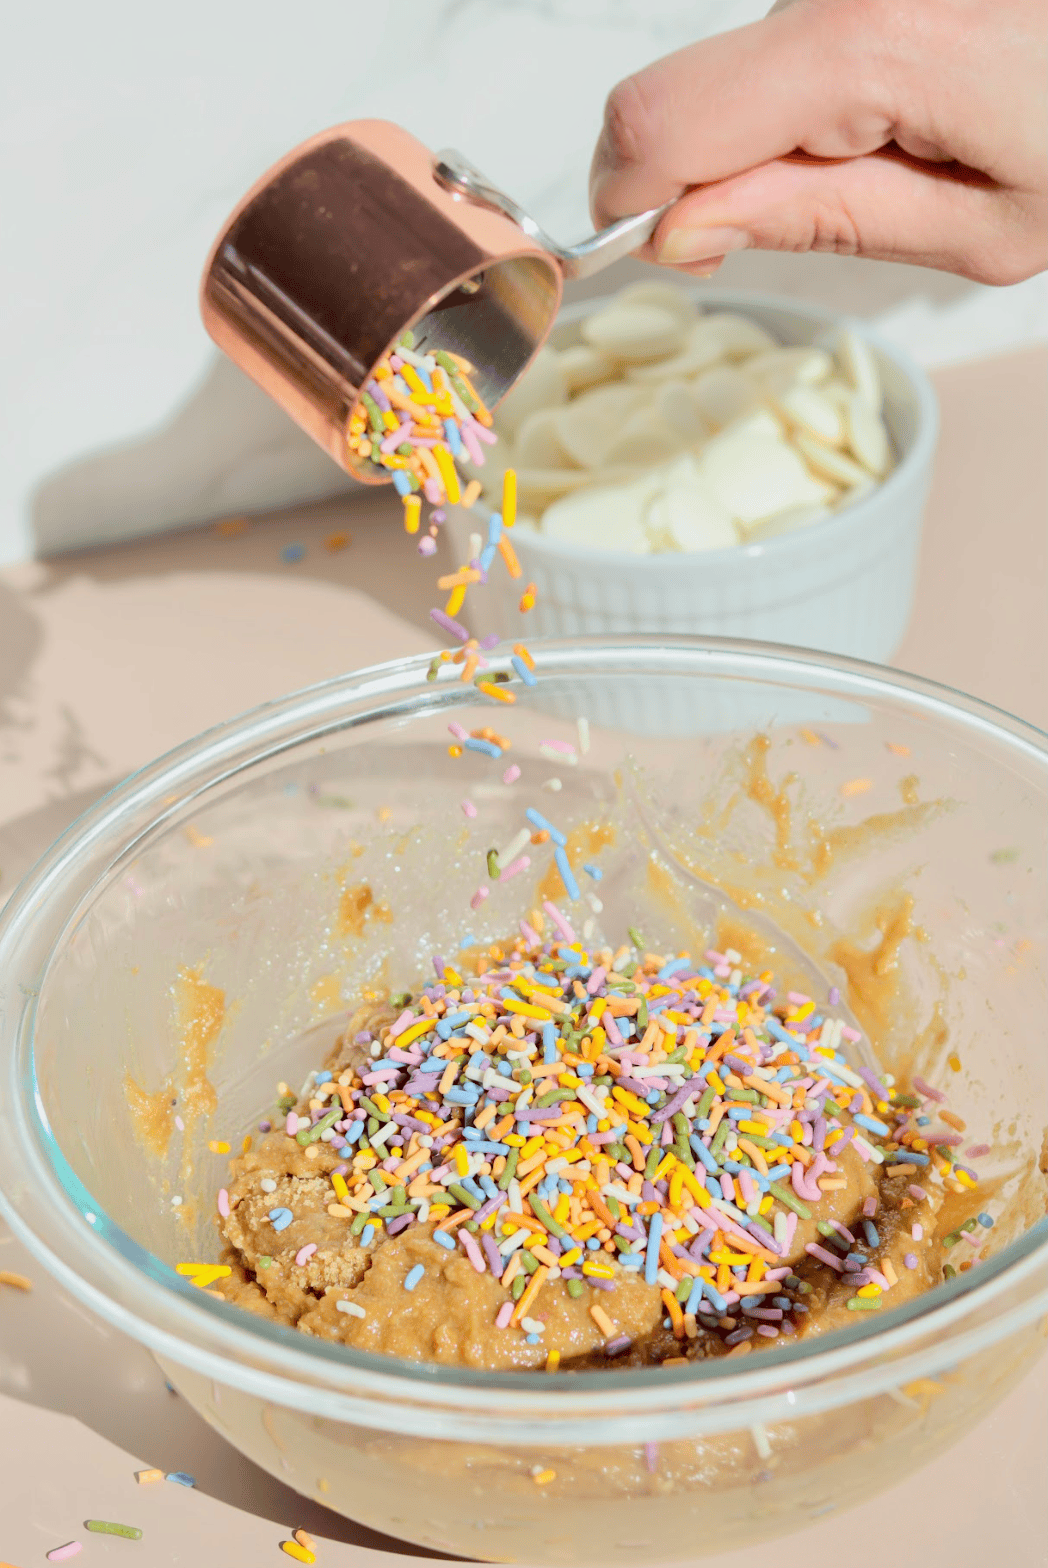
Step 2: Mix the Truffle Dough
Transfer the cookie crumbs to a mixing bowl. Add the coconut cream and vanilla extract and mix together until a soft, dough-like mixture forms that holds its shape when pressed. It should be moist enough to roll into balls without crumbling, but not so wet that it won’t hold a shape. If the mixture feels dry, add a small additional splash of coconut cream. If it feels too sticky, refrigerate for 10 minutes before rolling.
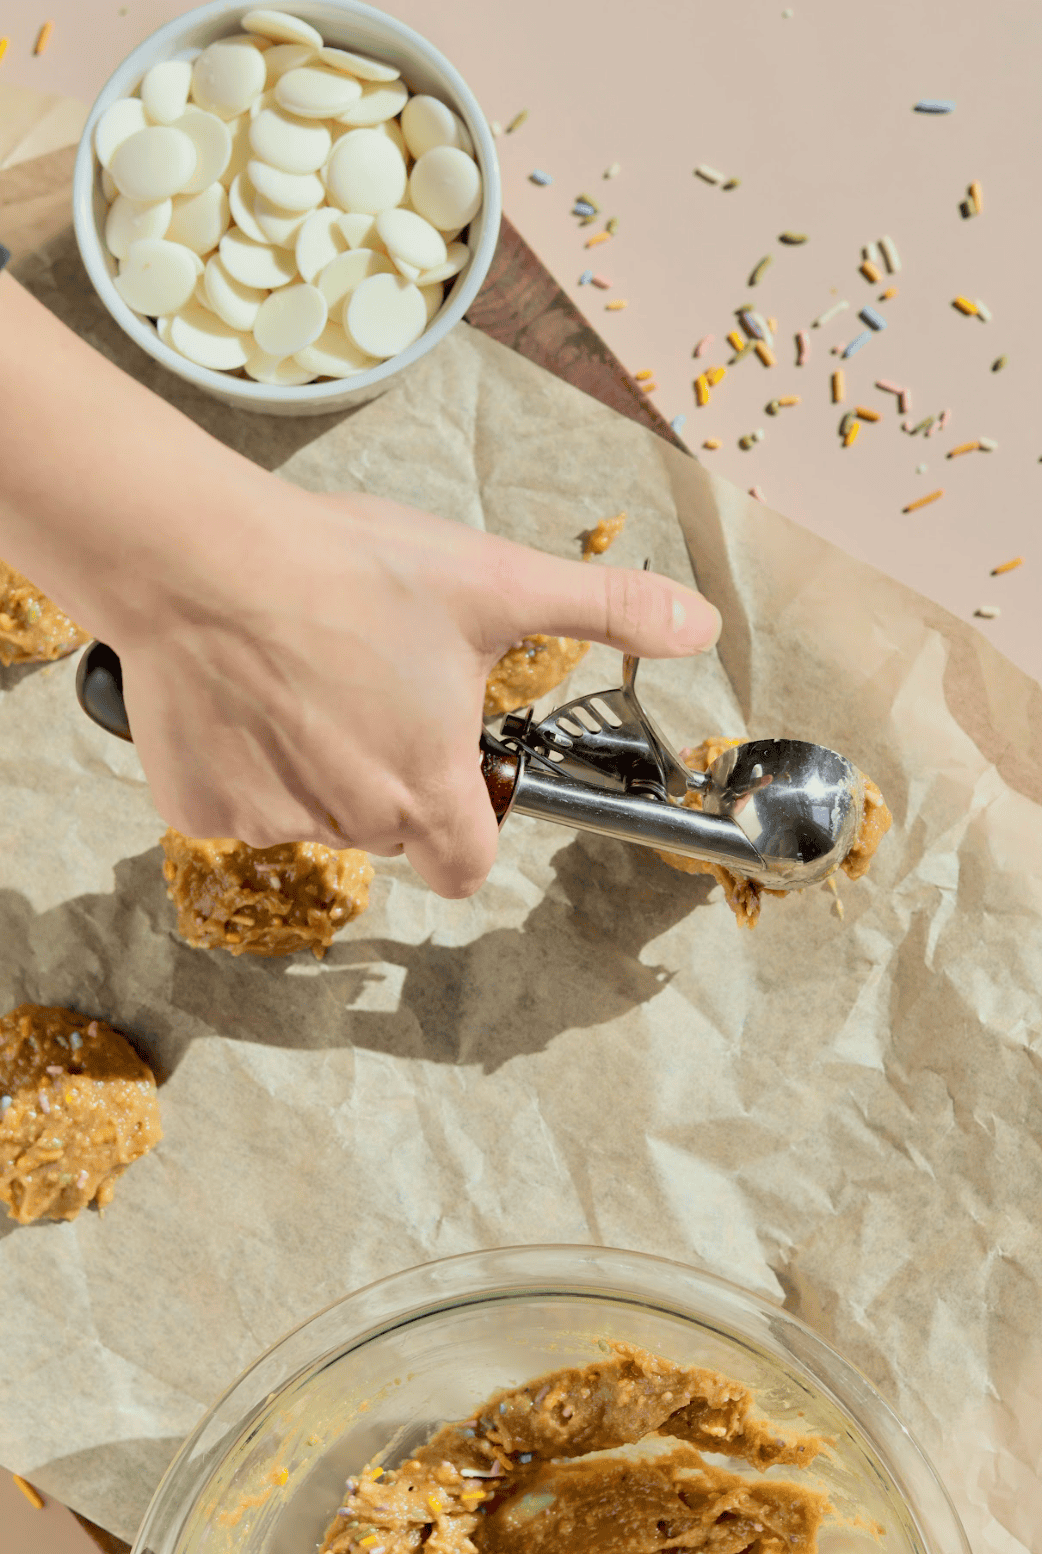
Step 3: Roll into Balls
Scoop the mixture using a small cookie scoop or tablespoon and roll between your palms into smooth, even balls. Place each one on a parchment-lined tray as you go. Aim for consistent sizing so the truffles all look uniform on the finished plate. If the mixture is sticking to your hands, lightly chill your palms or dampen them slightly between rolls.
Step 4: Firm Up in the Freezer
If the truffle balls feel soft or slightly wet after rolling, place the tray in the freezer for 5 to 10 minutes. Once chilled, take them out and gently re-roll each one between your palms to smooth and firm the shape before dipping. This step matters more than it might seem. A firmer truffle holds its shape in the warm chocolate instead of sagging or cracking during the dipping process.
Step 5: Melt the White Chocolate
Place the white chocolate chips or melting wafers in a microwave-safe bowl and melt in 20-second intervals, stirring thoroughly between each interval, until completely smooth and glossy. White chocolate burns easily, so short intervals and frequent stirring are important. Don’t rush it. If the chocolate seizes or thickens, stir in a small amount of coconut oil, a teaspoon at a time, to loosen it back to a dippable consistency.
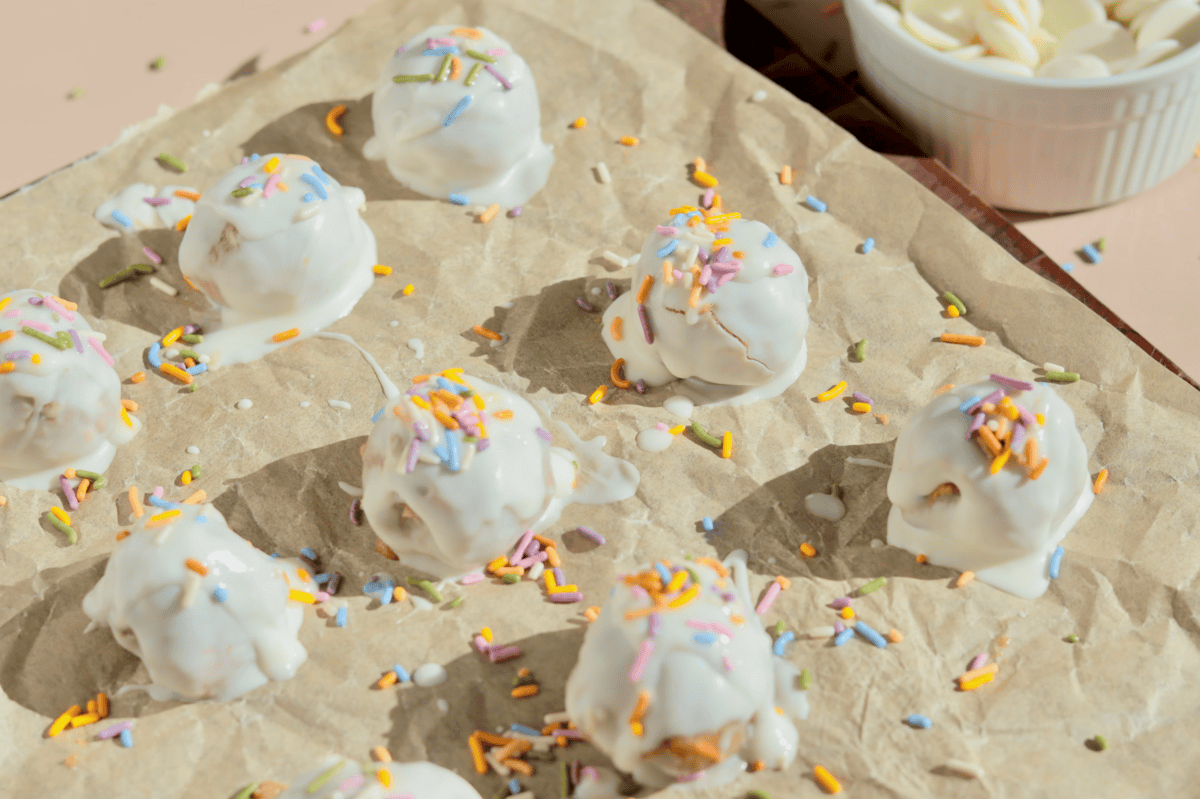
Step 6: Dip and Garnish
Working one at a time, drop a chilled truffle into the melted white chocolate. Use a fork or dipping tool to roll it until fully coated, then lift it out and let any excess chocolate drip off before returning it to the parchment-lined tray. Immediately scatter crushed cookie crumbs or sprinkles over the top before the chocolate sets. Once decorated, the coating firms quickly, so garnish each truffle right after dipping rather than doing them all at once.
Step 7: Set and Serve
Place the finished truffles in the refrigerator for about 10 minutes until the white chocolate coating is completely firm. Once set, they’re ready to serve. Transfer to a serving plate or store until ready to eat.
Storing and Make-Ahead Tips
These truffles are an ideal make-ahead dessert. Store them in an airtight container in the refrigerator for up to 5 days. The white chocolate coating protects the filling and keeps the truffles from drying out, so they hold up beautifully over several days without losing quality.
To freeze, place the truffles in a single layer on a parchment-lined tray and freeze until solid, then transfer to a zip-lock freezer bag or airtight container and freeze for up to 2 months. Thaw in the refrigerator for about 30 minutes before serving. The sprinkles may bleed slightly into the coating after freezing, which is purely cosmetic and doesn’t affect the flavor.
For a party or event, make the truffle filling and roll the balls up to two days ahead. Keep them on the parchment-lined tray in the fridge, then dip and garnish the day of for the freshest-looking result.
Frequently Asked Questions About Birthday Cake Cookie Truffles
Can I use a different brand of birthday cake cookies?
Yes. Goodie Girl Birthday Cake Sandwich Cookies are recommended because they’re gluten-free and have a strong, authentic birthday cake flavor with real sprinkles baked in. If you can’t find them or don’t need a gluten-free option, any birthday cake or funfetti-flavored sandwich cookie works well in this recipe. Golden Oreos with funfetti filling are a widely available alternative.
Can I use regular cream cheese instead of coconut cream?
Yes. Softened regular cream cheese is a classic truffle binding ingredient and works beautifully here if you don’t need a dairy-free option. Use about 4 ounces of softened cream cheese in place of the coconut cream. The filling will be slightly richer and tangier, which pairs well with the sweet birthday cake cookies and white chocolate coating.
Why is my white chocolate seizing up?
White chocolate is more sensitive to heat than dark or milk chocolate and can seize, meaning it becomes thick and grainy, if it gets too hot or comes into contact with even a small amount of water. Make sure your bowl and utensils are completely dry before melting, use short 20-second microwave intervals, and stir thoroughly between each one. If it does seize, stir in a teaspoon of coconut oil or neutral vegetable oil at a time until it loosens back to a smooth consistency.
No-Bake Birthday Cake Cookie Truffles
Ingredients
Instructions
- Crush the Goodie Girl Birthday Cake cookies in a food processor until they resemble fine crumbs.
- In a bowl, mix the crushed cookies with coconut cream and vanilla extract until a soft, dough?like mixture forms.
- Scoop and roll the mixture into bite?sized balls and place them on a parchment?lined tray.
- If the balls feel a little too soft or “wet,” place the tray in the freezer for 5–10 minutes, then take them out and gently remold each truffle with your hands to smooth and firm the shape before dipping.
- Melt the white chocolate in the microwave in 20?second intervals, stirring in between until smooth and glossy.
- Dip each chilled truffle ball into the melted white chocolate, coating it fully, and return it to the tray.
- Immediately garnish with crushed Birthday Cake cookies or sprinkles.
- Let the truffles set in the fridge for about 10 minutes, or until the coating is firm, then serve.