Coconut Mango Ice Cream with Toasted Coconut Ribbons
This is the ice cream that makes people ask if you have an ice cream maker, and when you tell them you don’t, they don’t believe you. No churn, no machine, no technical skills required. Just ripe mango purée, whipped heavy cream and coconut cream, sweetened condensed milk, a squeeze of lime zest, and layers of toasted coconut ribbons that run through the whole loaf and add a golden, crunchy contrast to the creamy, tropical base. Six to eight hours in the freezer and you have something that looks and tastes like it came from a serious ice cream shop.
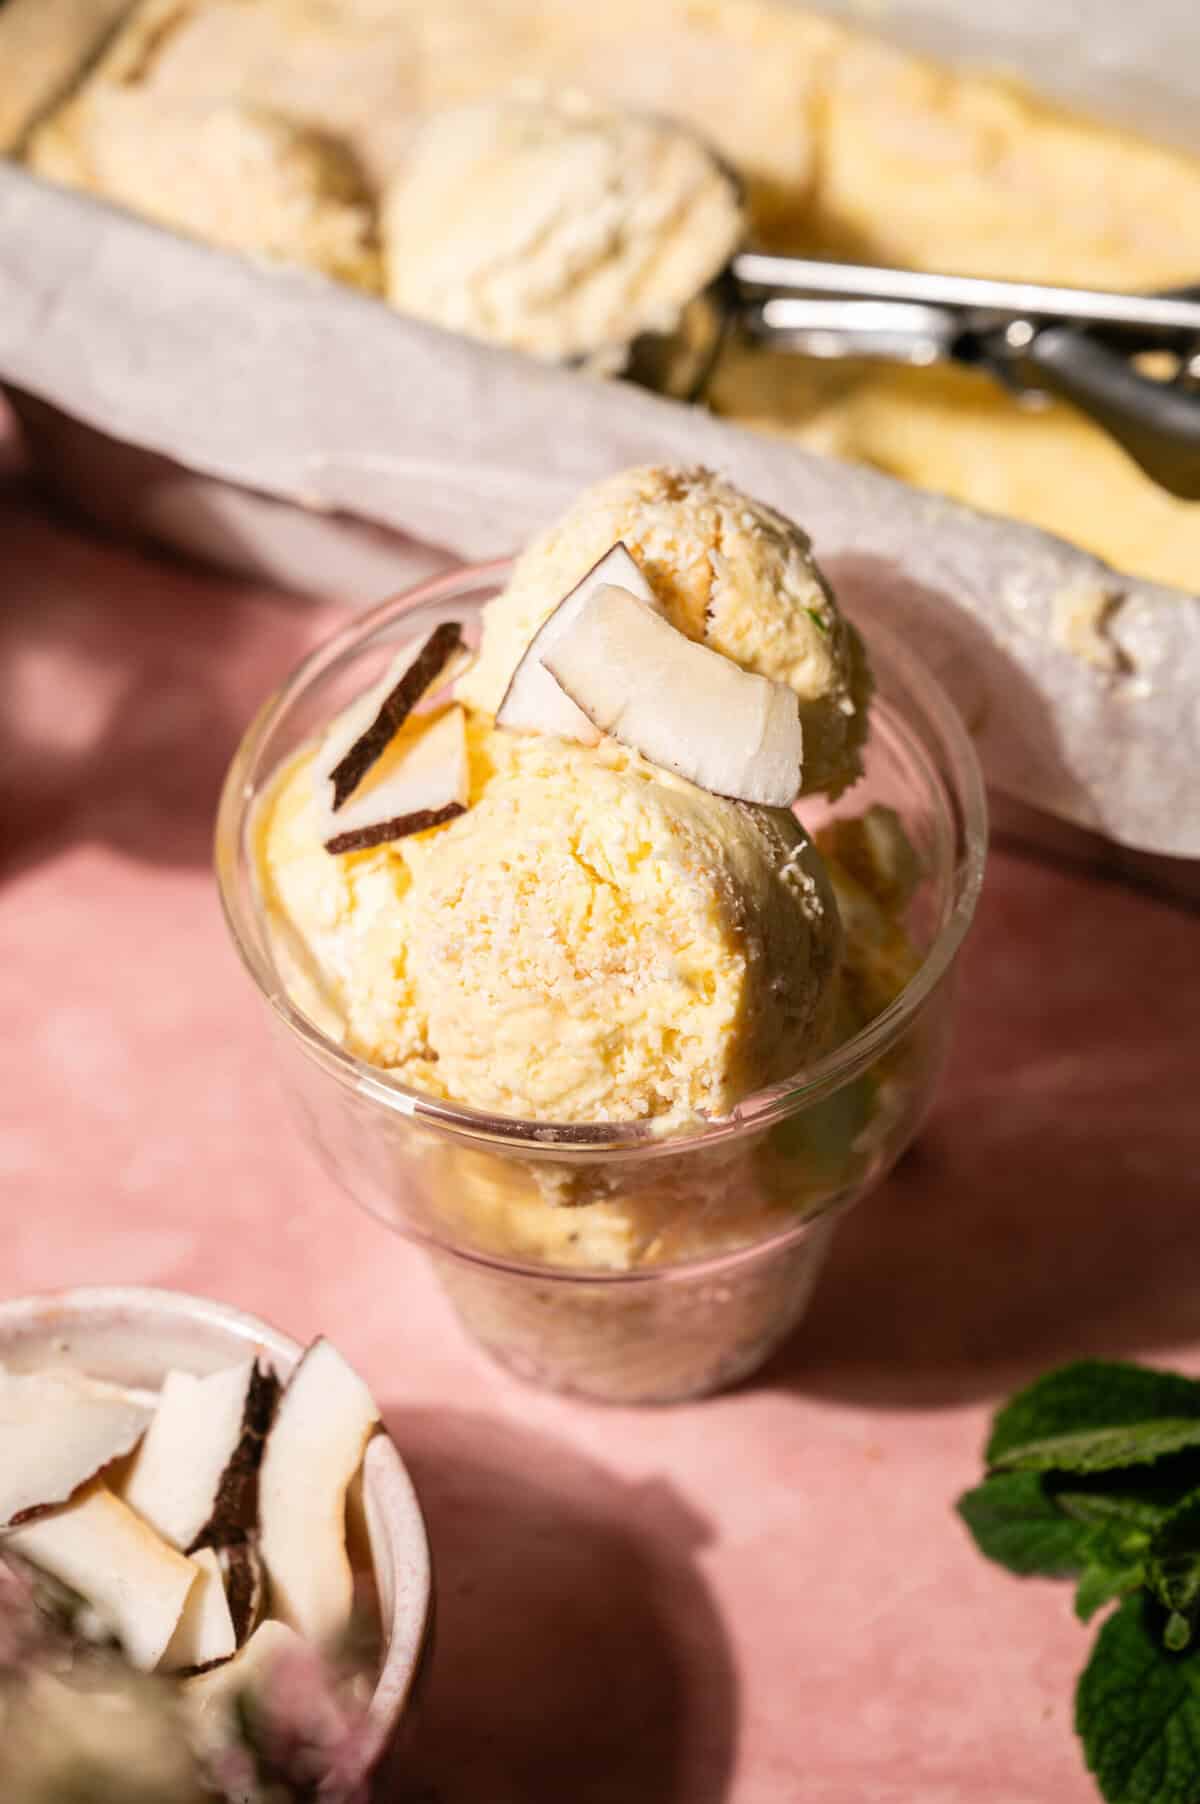
The technique is the no-churn method, which uses whipped cream as the base instead of a custard, and sweetened condensed milk as the sweetener that also prevents the ice cream from freezing rock solid. The coconut cream whipped in with the heavy cream adds a rich, tropical depth that makes this taste unmistakably coconut without being artificially flavored. The toasted coconut layered through the middle and scattered on top adds a texture and a nutty, caramelized sweetness that is the detail that makes this recipe memorable.
Ingredients Needed to Make Coconut Mango Ice Cream
Simple, fresh ingredients with one technique that makes all the difference. Here’s what you need:
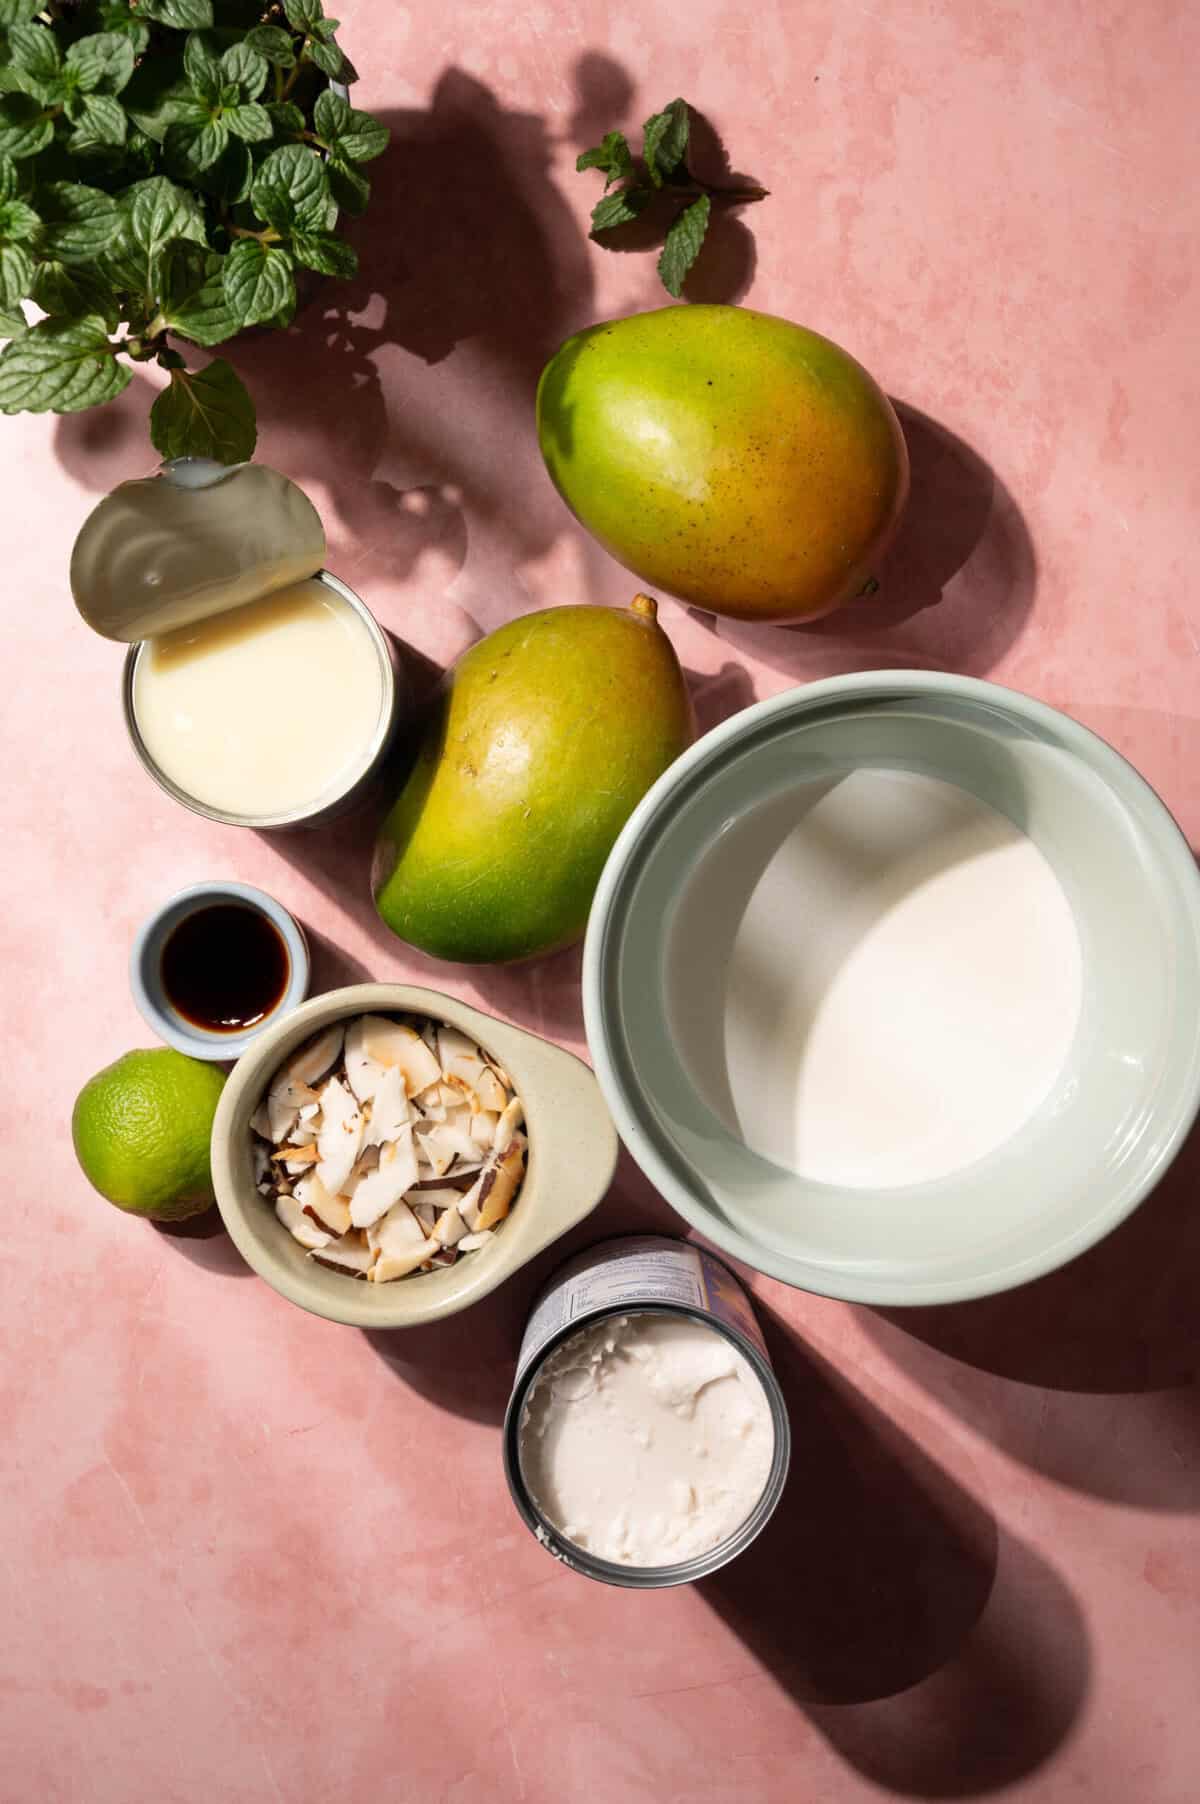
- Mango purée (about 2 ripe mangos blended smooth; the riper and more fragrant the mango, the more intensely flavored the finished ice cream)
- Cold heavy cream (the base of the whipped cream structure; must be very cold before whipping)
- Cold coconut cream, from the thick part of a full-fat canned coconut milk (chilling the can overnight causes the cream to separate from the liquid and rise to the top for easy scooping)
- Sweetened condensed milk (sweetens the ice cream and prevents it from freezing too hard)
- Vanilla extract, optional (adds warmth and rounds out the tropical flavors)
- Pinch of salt (sharpens and balances all the sweetness)
- Lime zest, from one lime (the brightness that keeps the whole ice cream tasting fresh)
- Shredded coconut, toasted (layered through the ice cream for golden, crunchy ribbons in every scoop)
How to Make Coconut Mango Ice Cream
No machine needed. Here’s how it comes together.
Step 1: Toast the Coconut
Add the shredded coconut to a dry skillet over medium heat. Cook, stirring frequently, until the coconut turns golden and fragrant, about 3 to 5 minutes. It goes from pale to perfectly golden to burnt very quickly, so keep stirring and watch it closely. Remove from heat and spread on a plate to cool completely. The coconut must be fully cooled before it goes into the ice cream or it will melt the base and prevent clean layers.

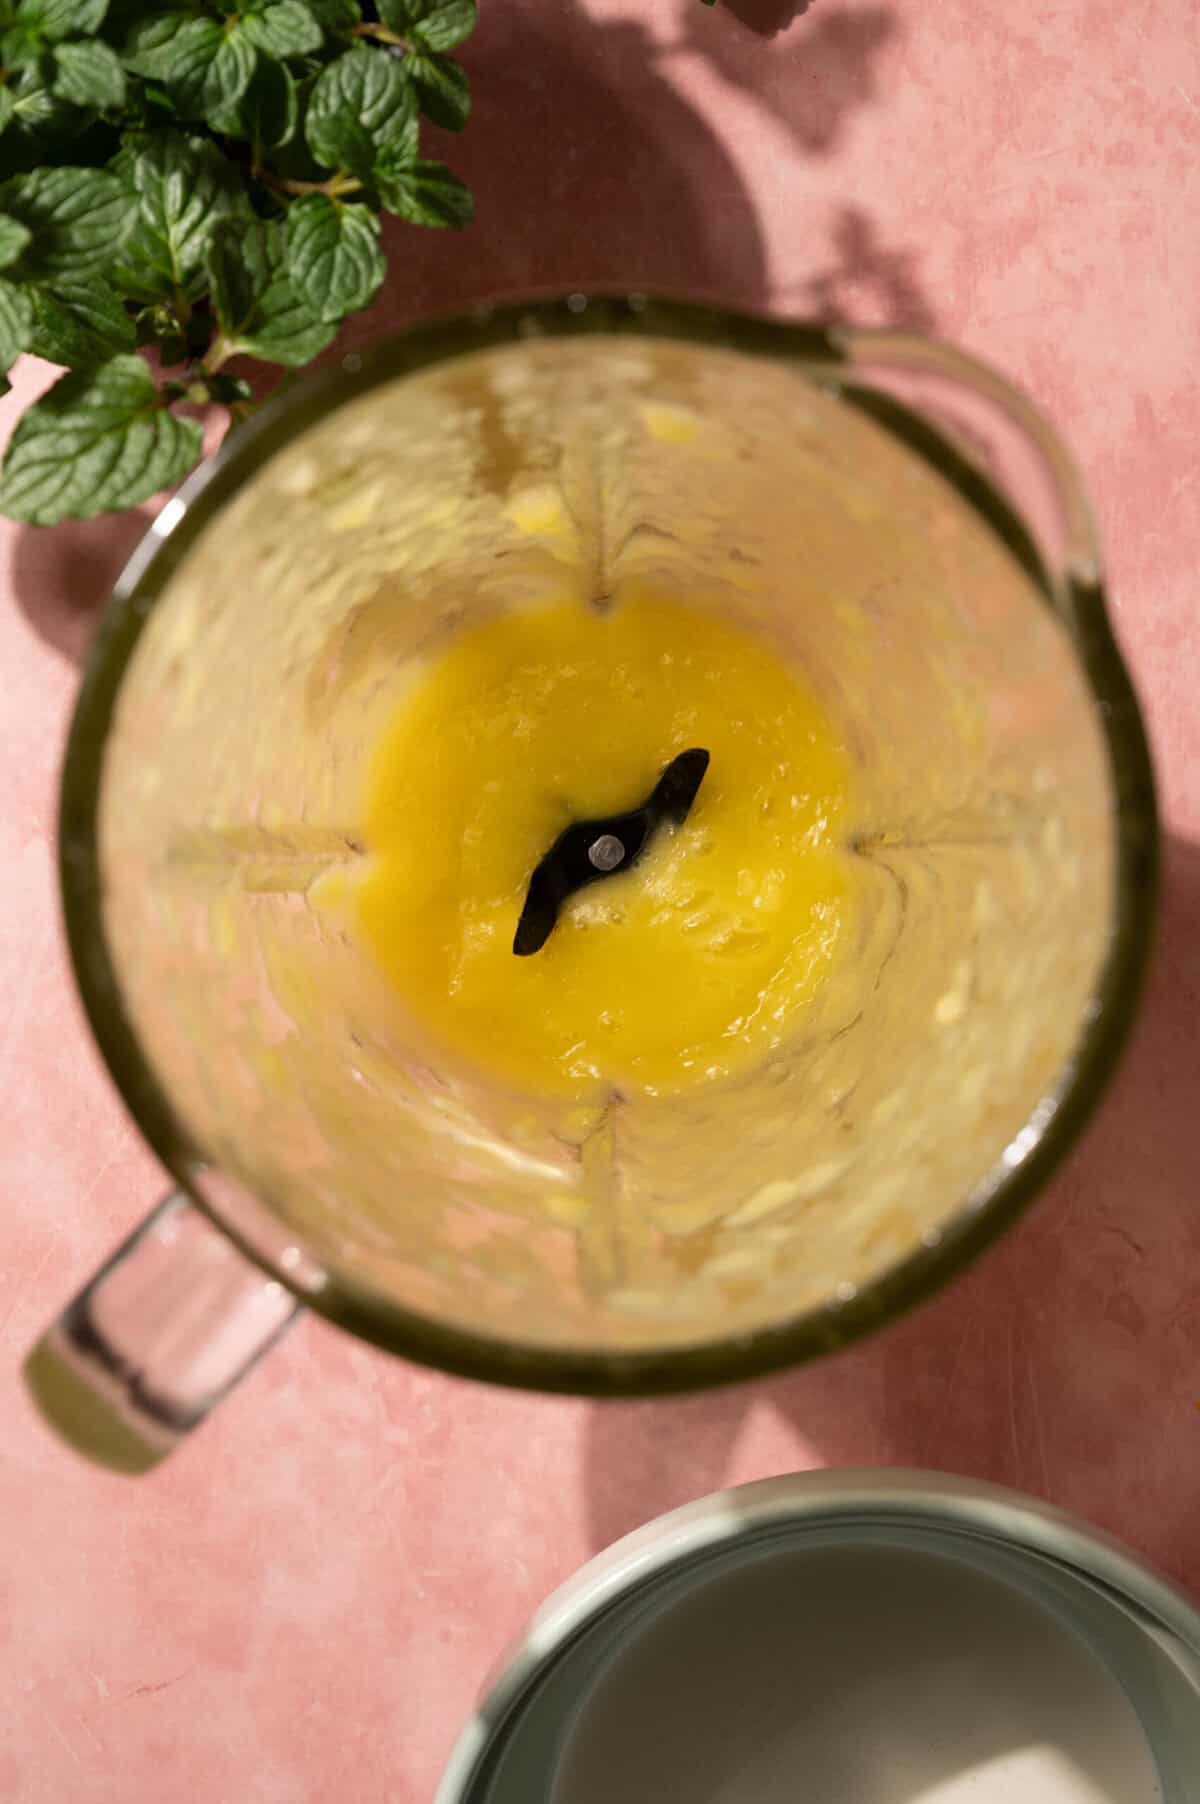
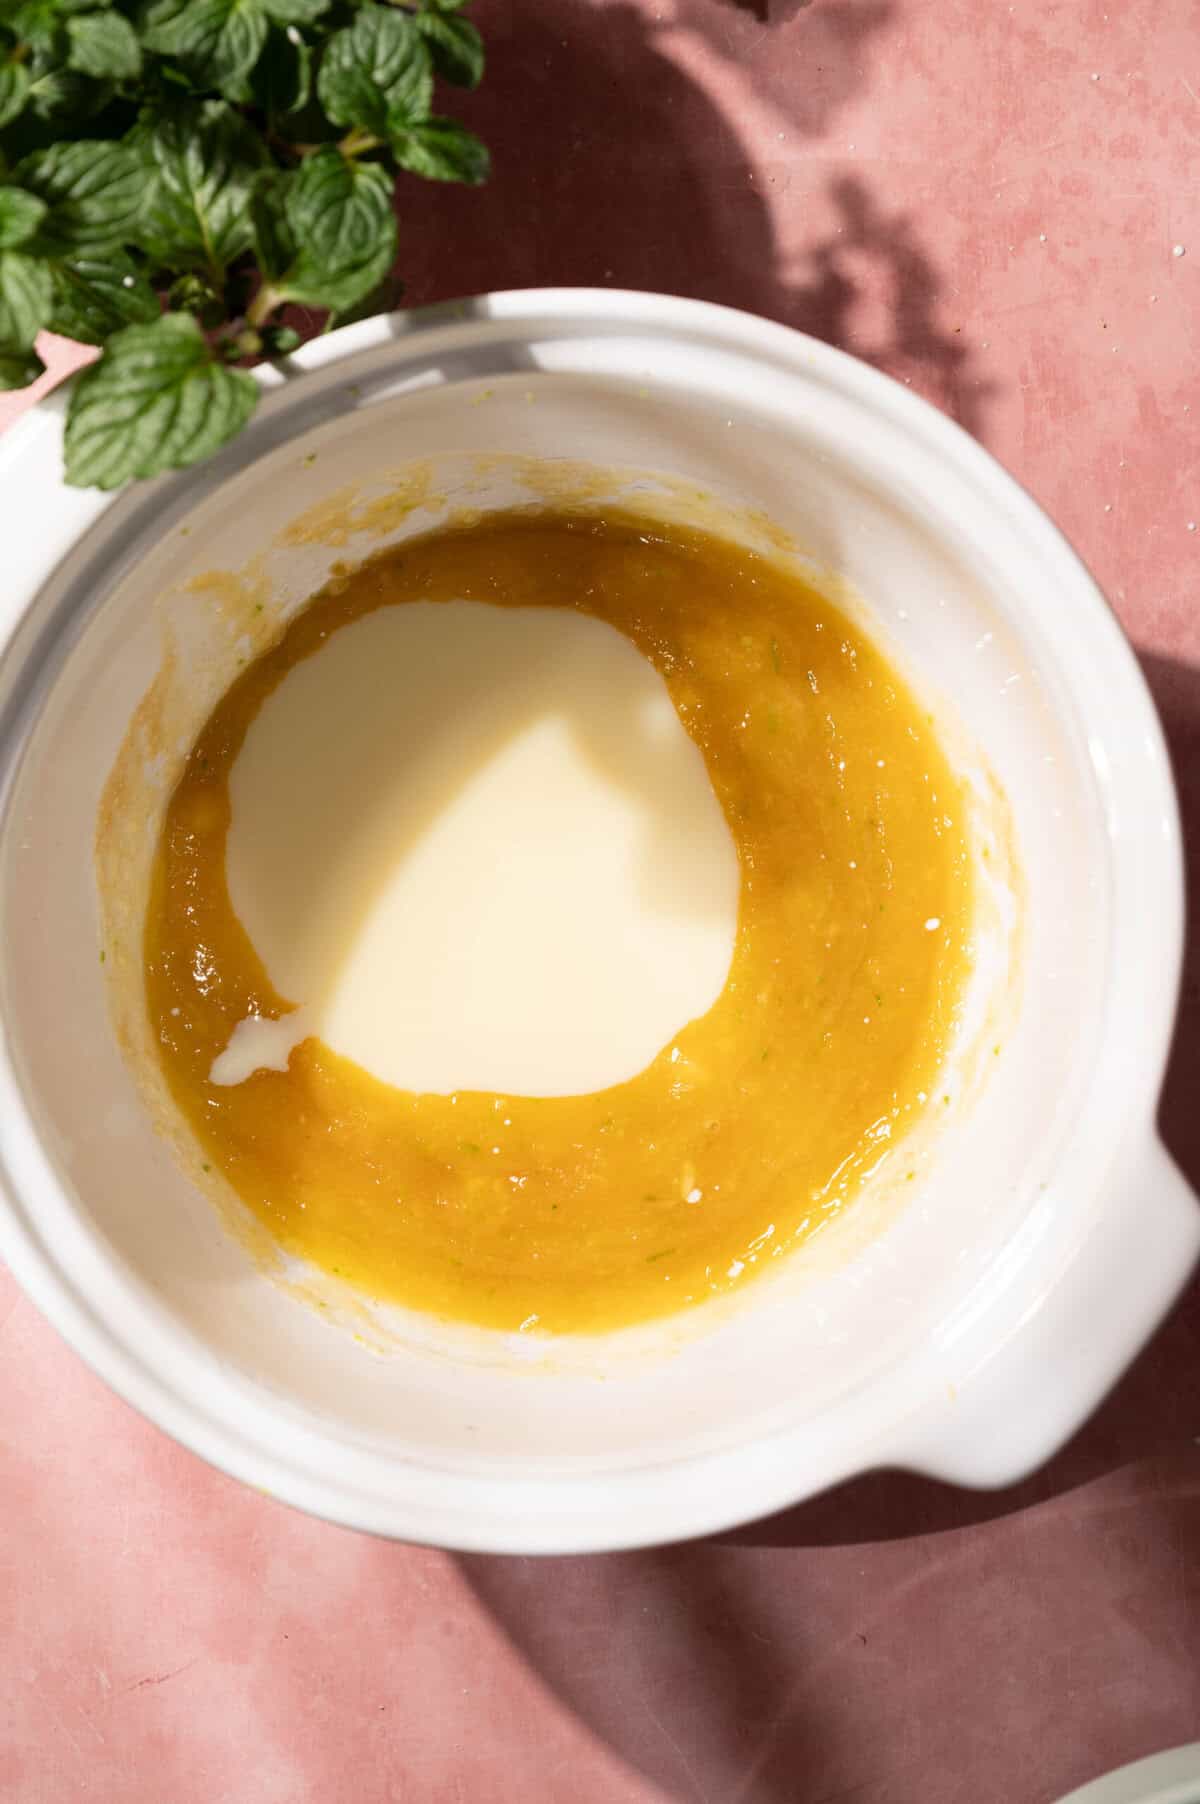
Step 2: Make the Mango Base
In a large bowl, whisk together the sweetened condensed milk, mango purée, vanilla extract, salt, and lime zest until smooth and completely combined. Taste the mixture and adjust the sweetness or lime zest if needed. Set aside.
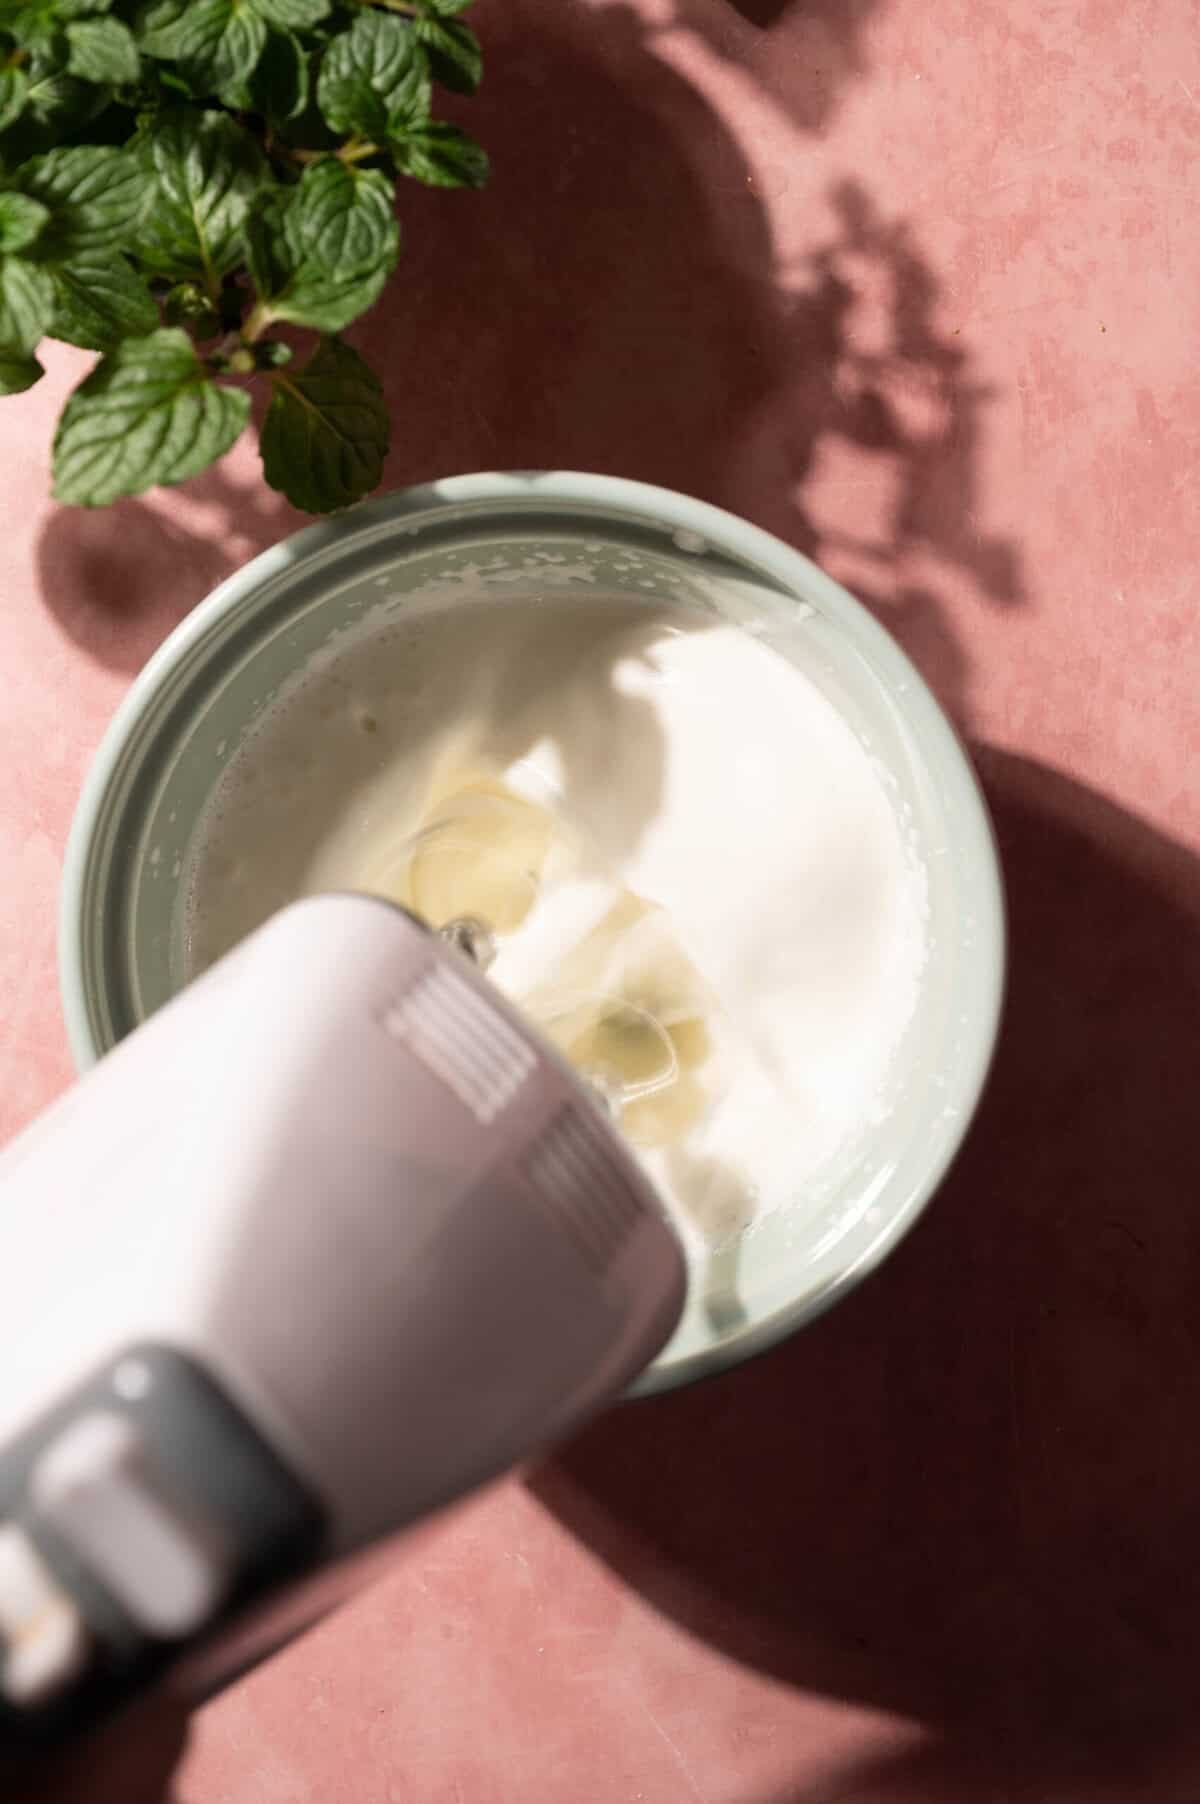
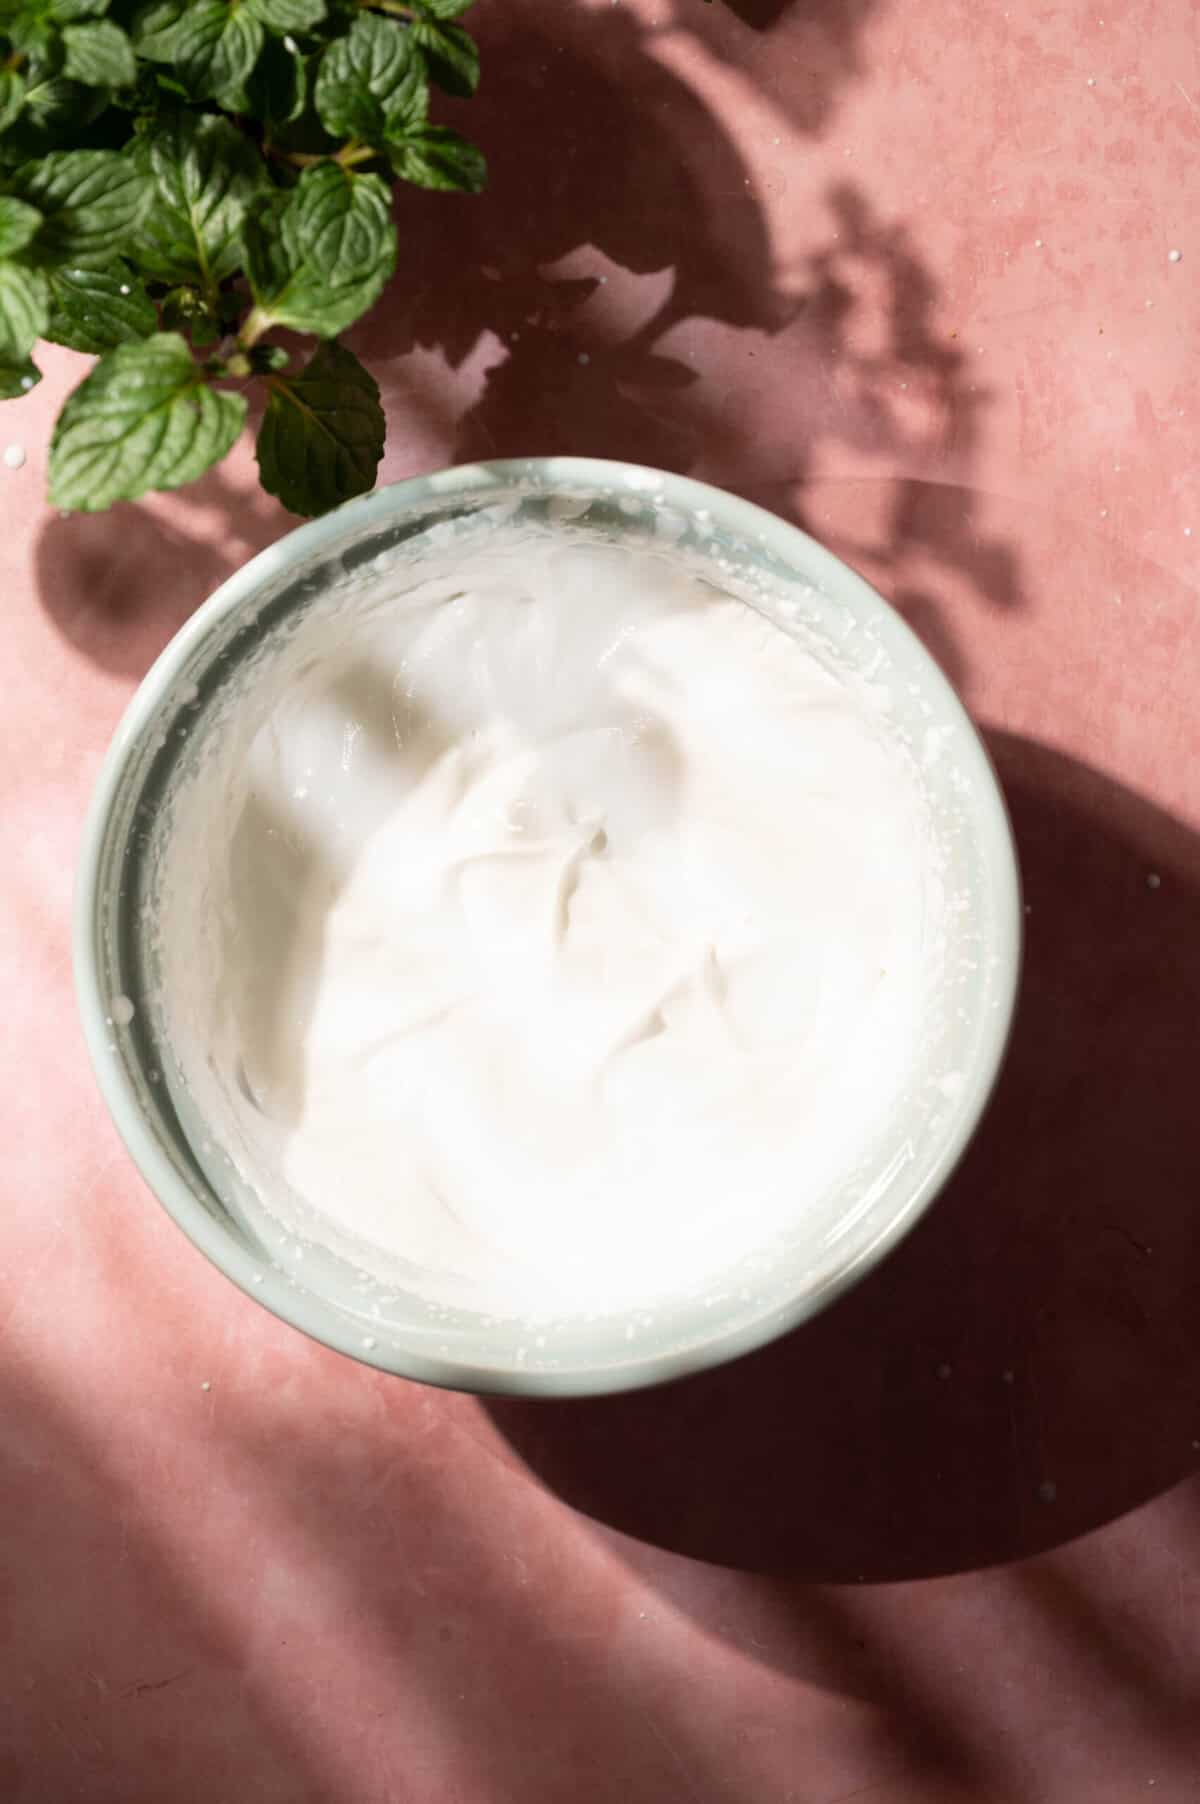
Step 3: Whip the Cream
In a separate, well-chilled bowl, combine the cold heavy cream and cold coconut cream. Beat on medium-high speed until soft to medium peaks form. The mixture should be thick, airy, and hold its shape when the beater is lifted but not look grainy or overbeaten. Very cold cream is essential here. If the cream is too warm it won’t whip properly.
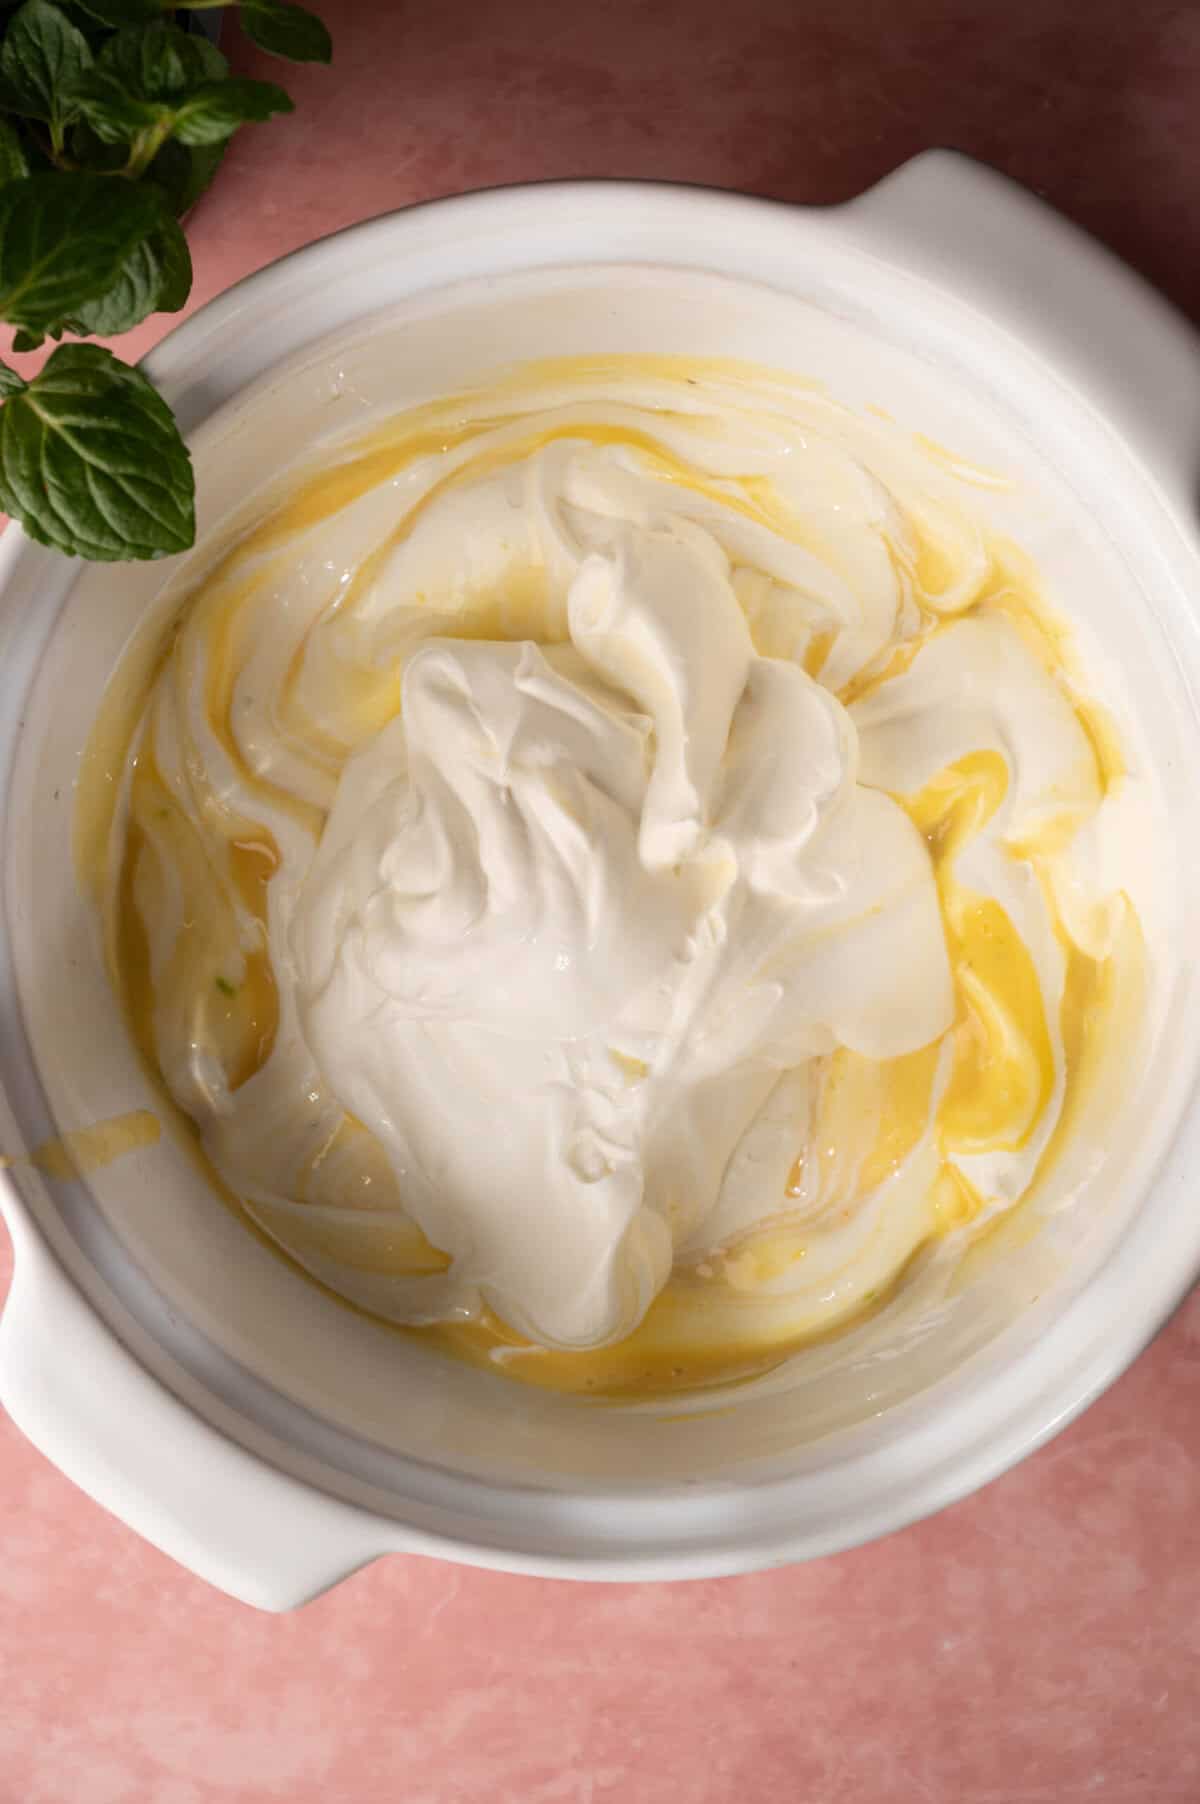
Step 4: Fold Together
Add the whipped cream to the mango base in 2 to 3 additions, folding gently with a rubber spatula after each addition. Use broad, sweeping folds rather than stirring, and stop as soon as no white streaks remain. Overmixing deflates the whipped cream and produces a denser, less airy final texture.
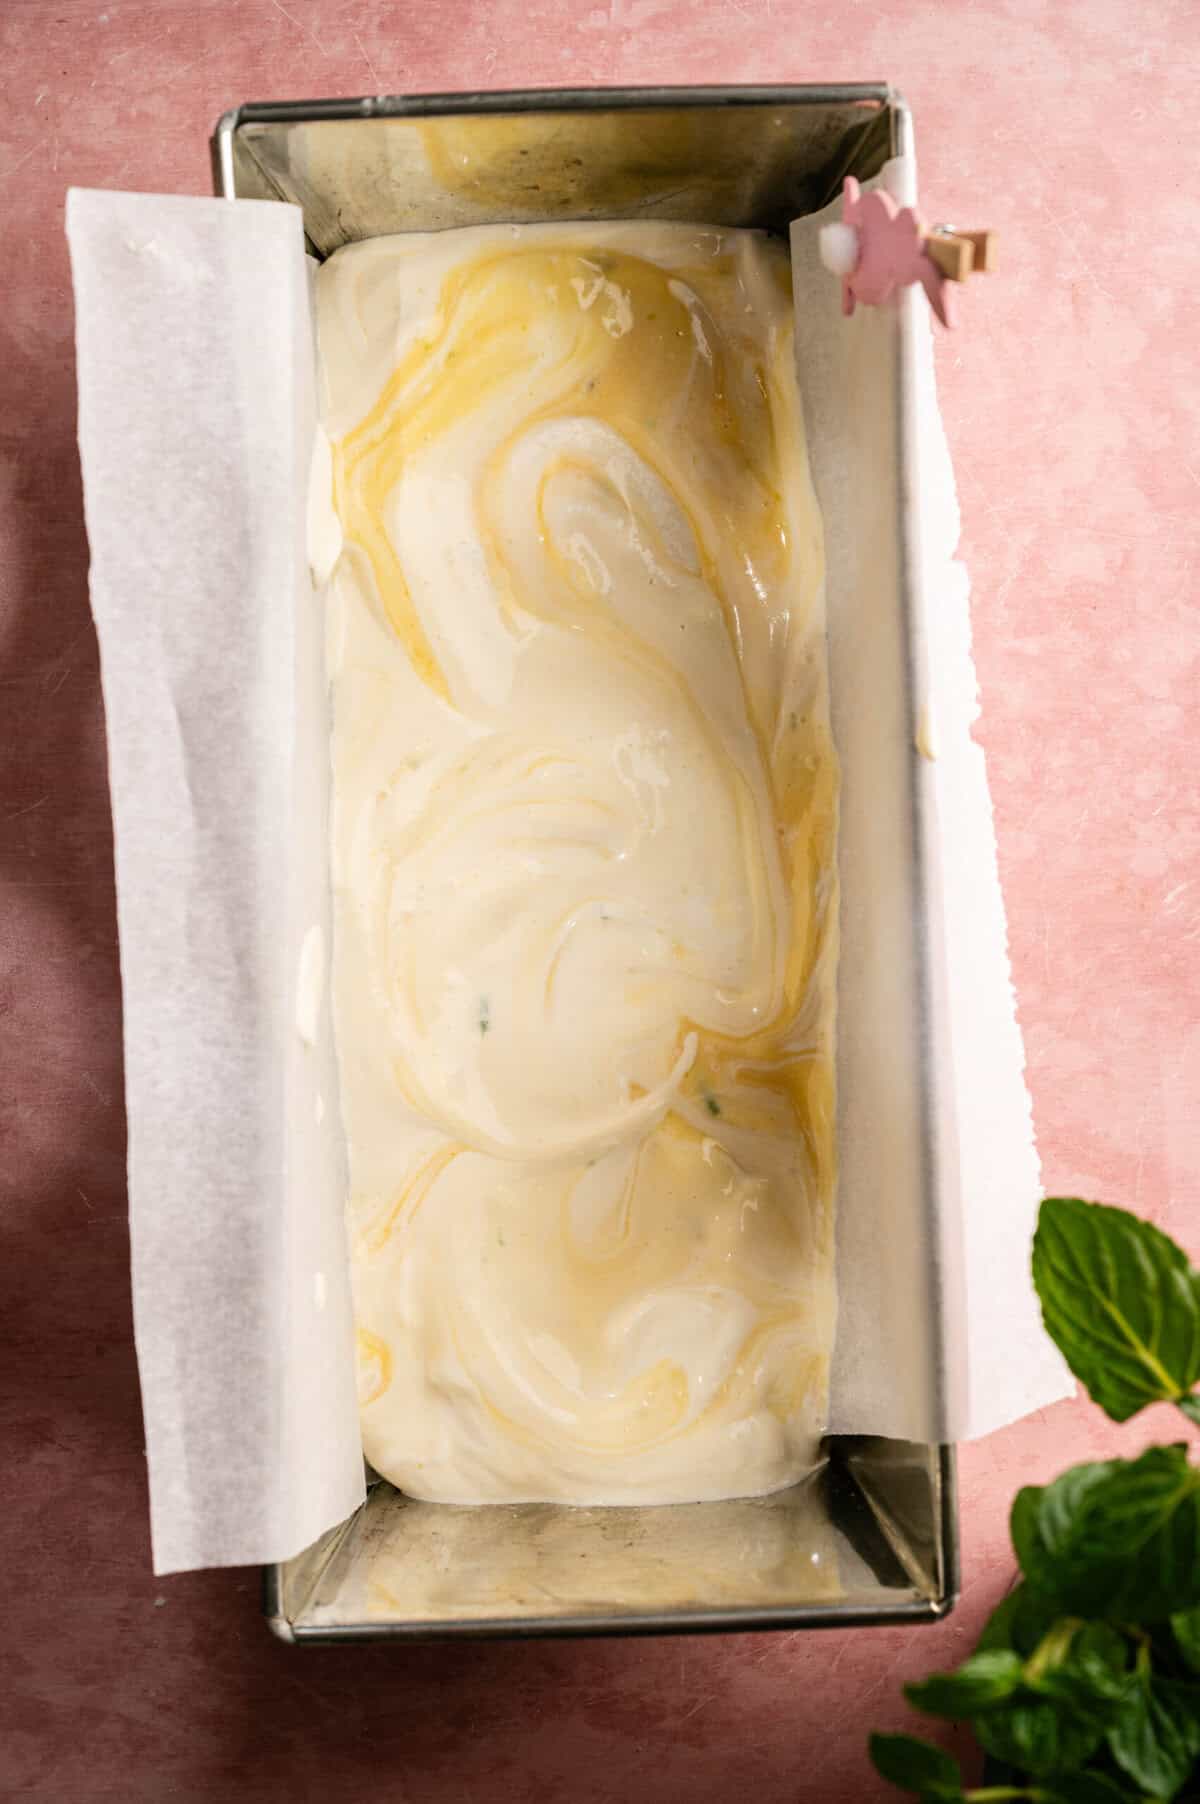
Step 5: Layer in the Pan
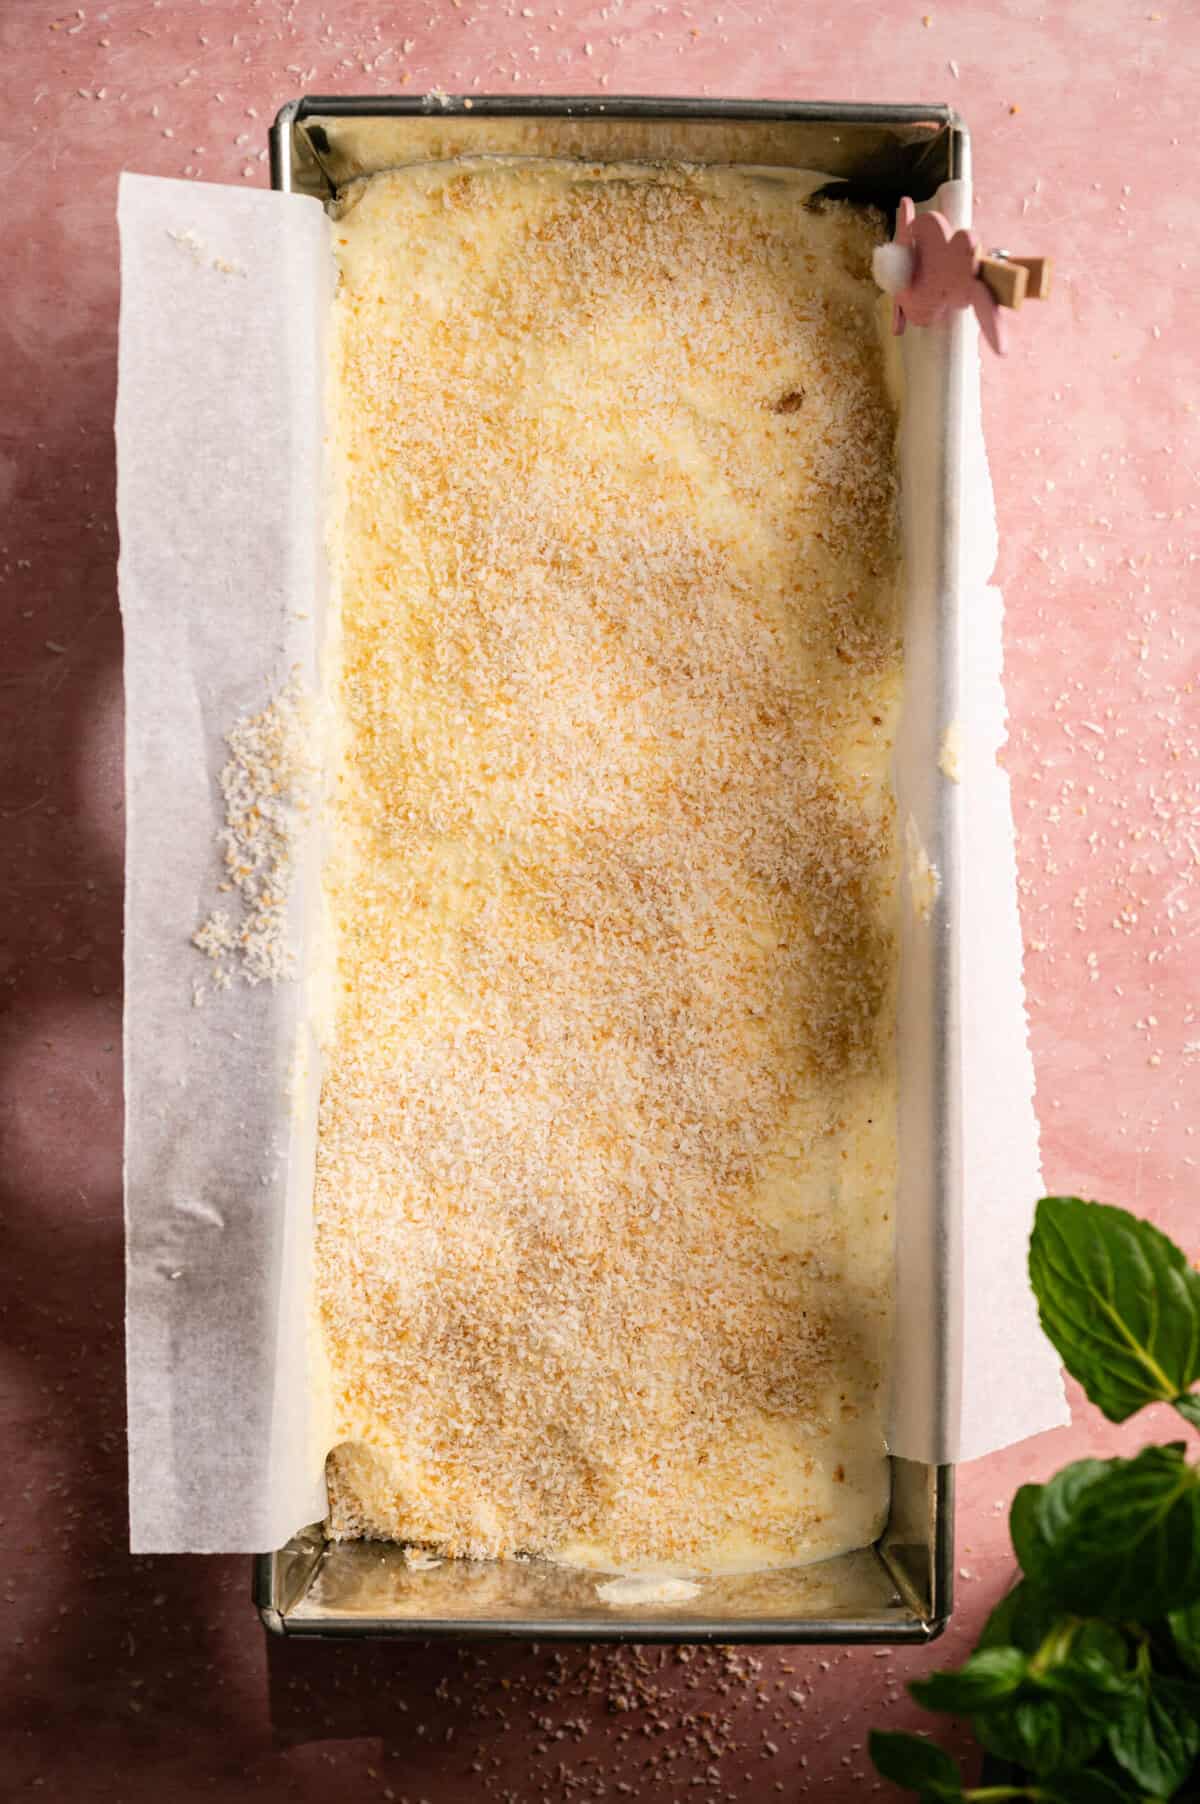
Pour about one third of the ice cream base into a loaf pan or freezer-safe container and smooth it into an even layer. Sprinkle a thin, even layer of cooled toasted coconut over the surface, enough to mostly cover but not so thick it creates a hard, impenetrable layer. Add another third of the base and repeat the coconut layer. Finish with the remaining base and a final light sprinkle of toasted coconut across the top.
Step 6: Freeze and Serve
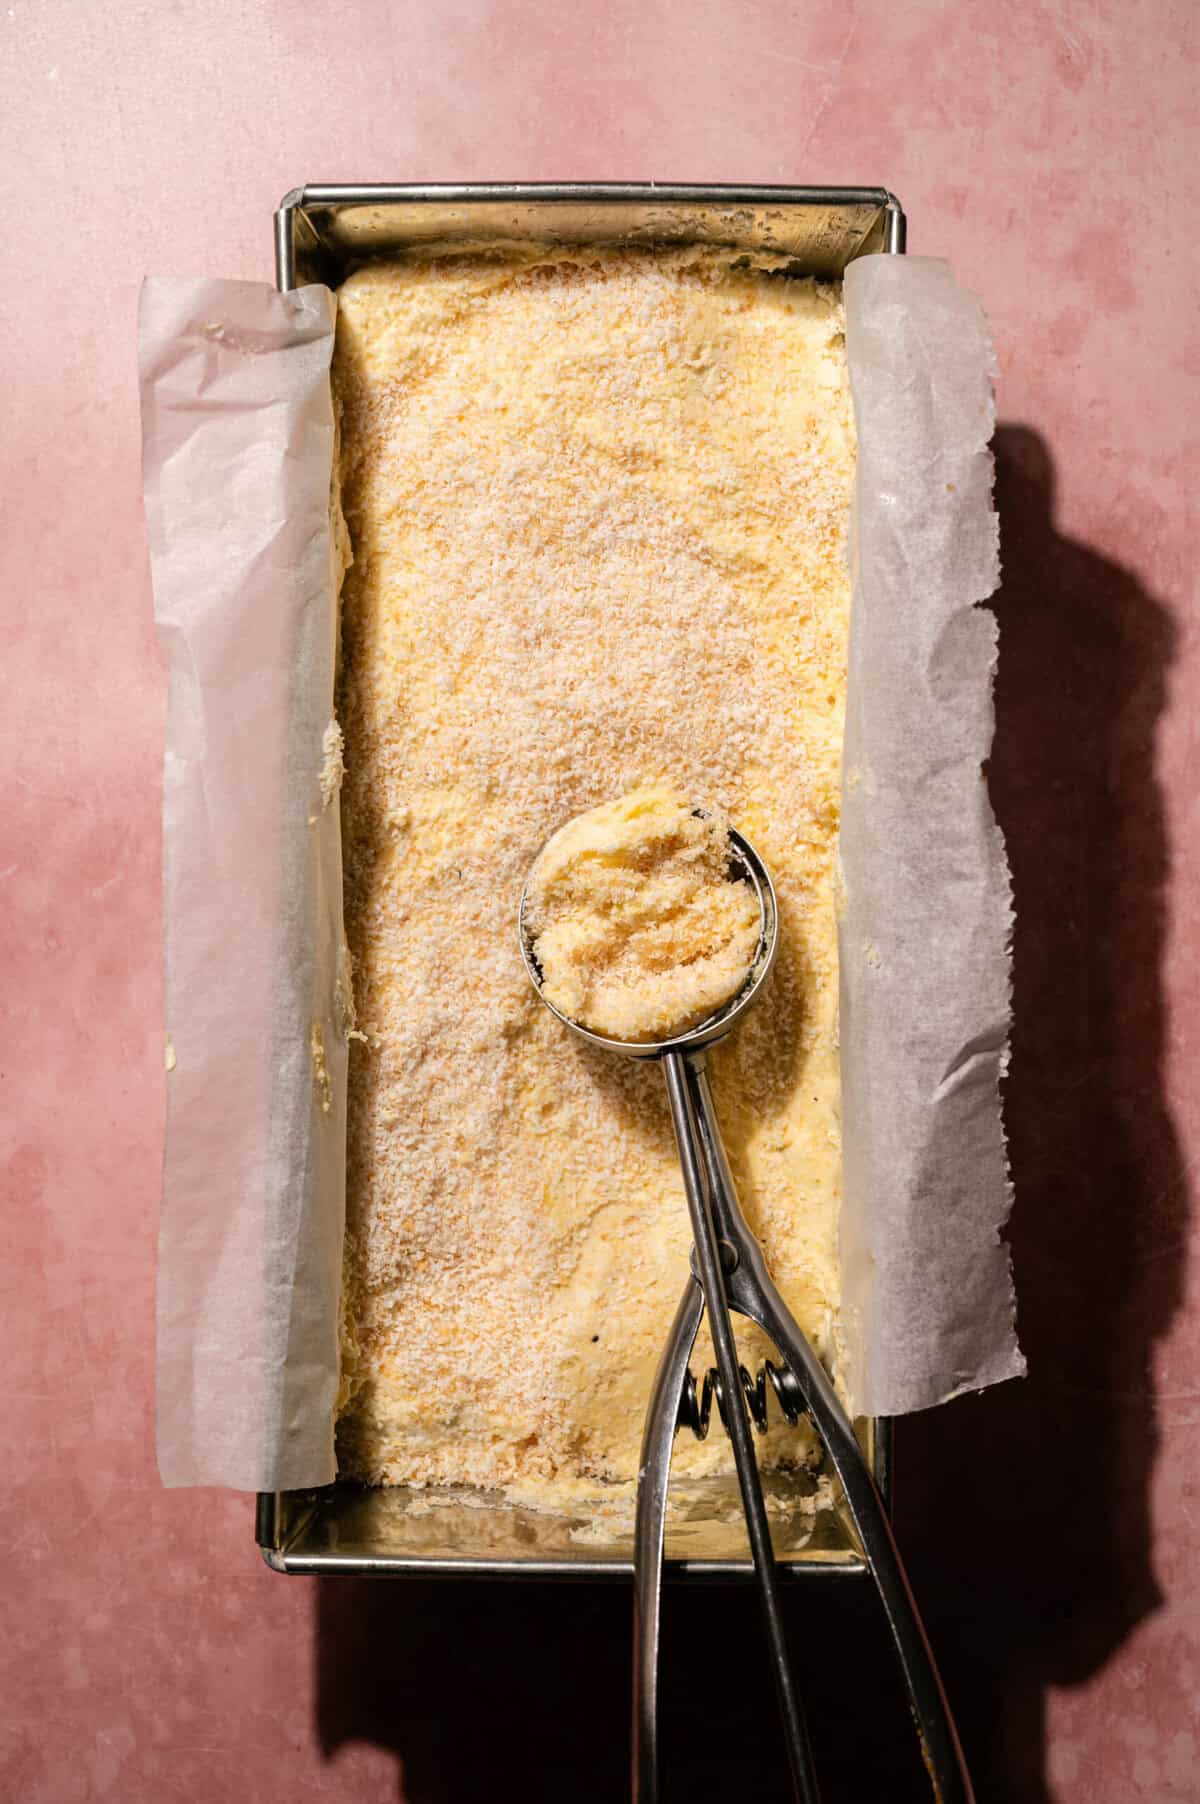
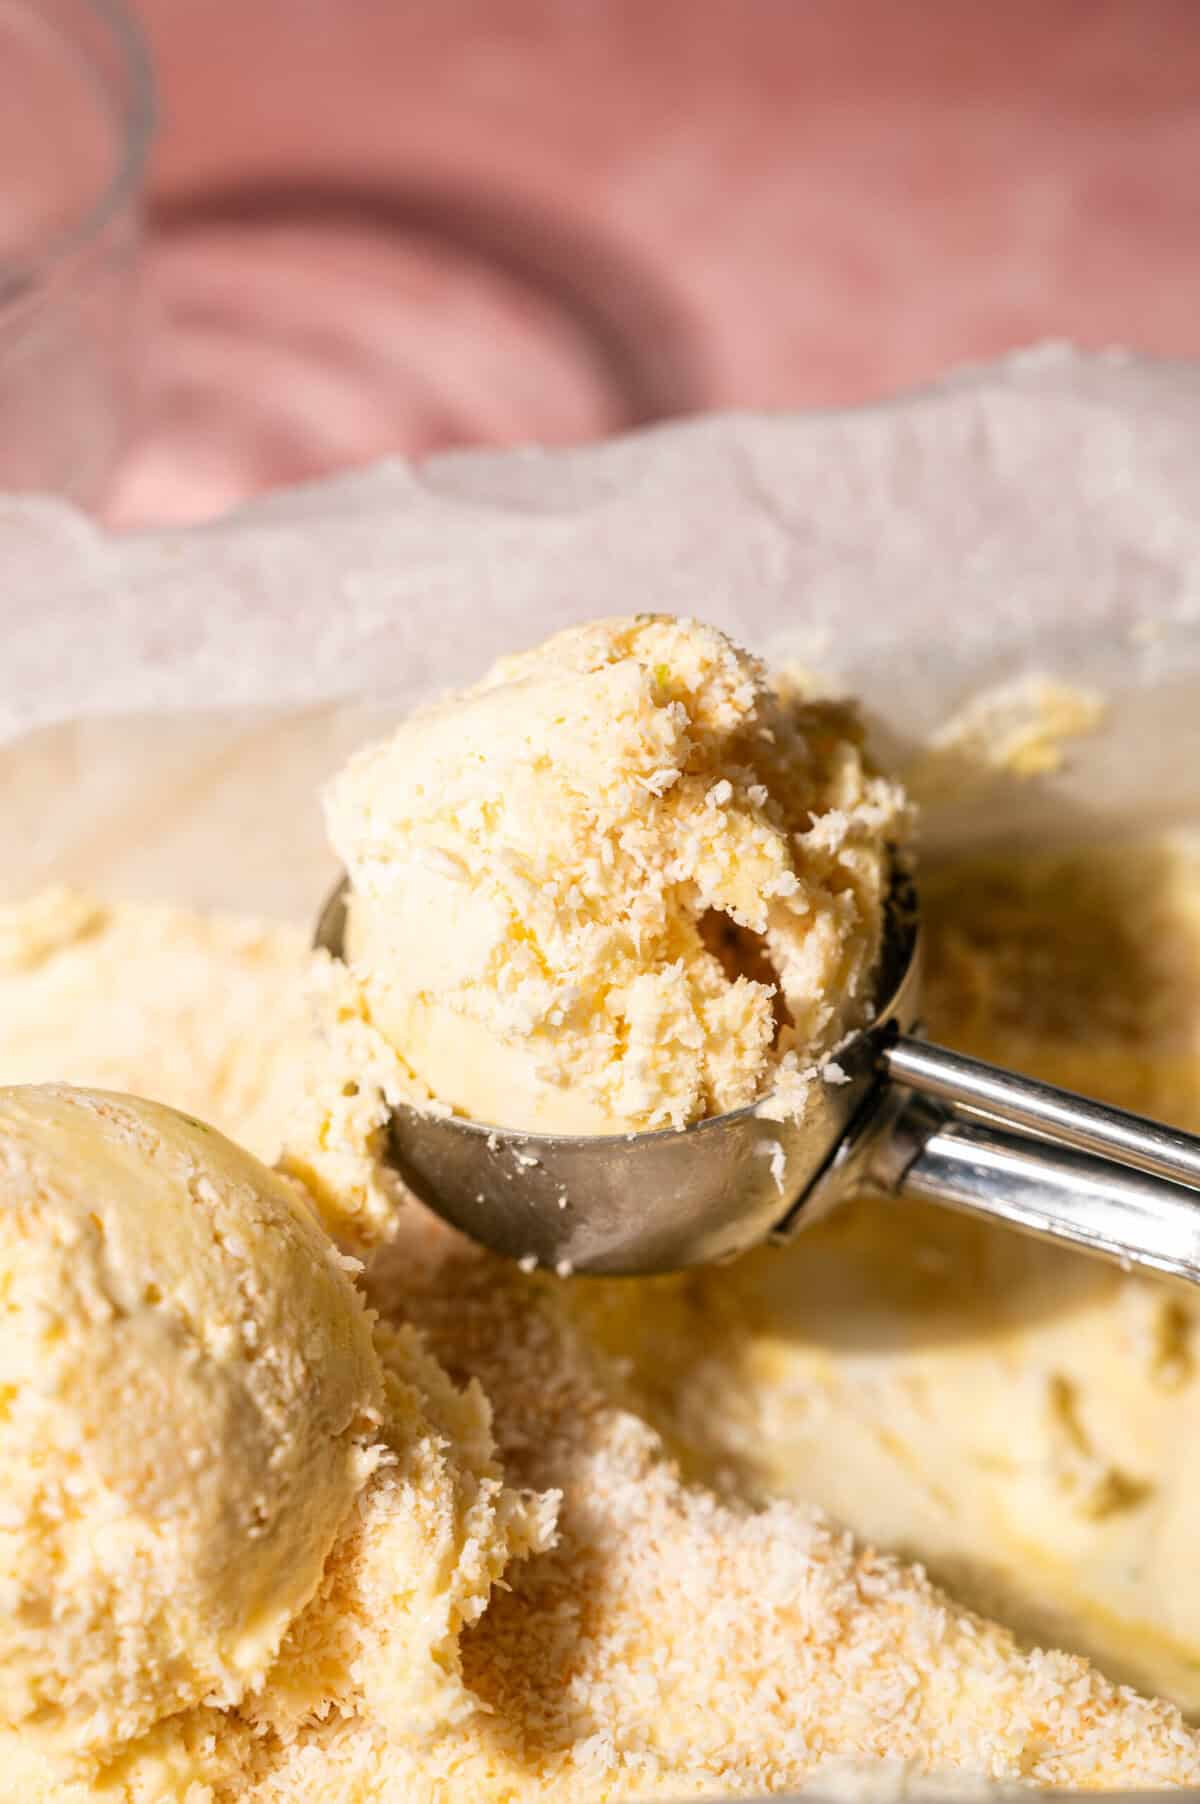
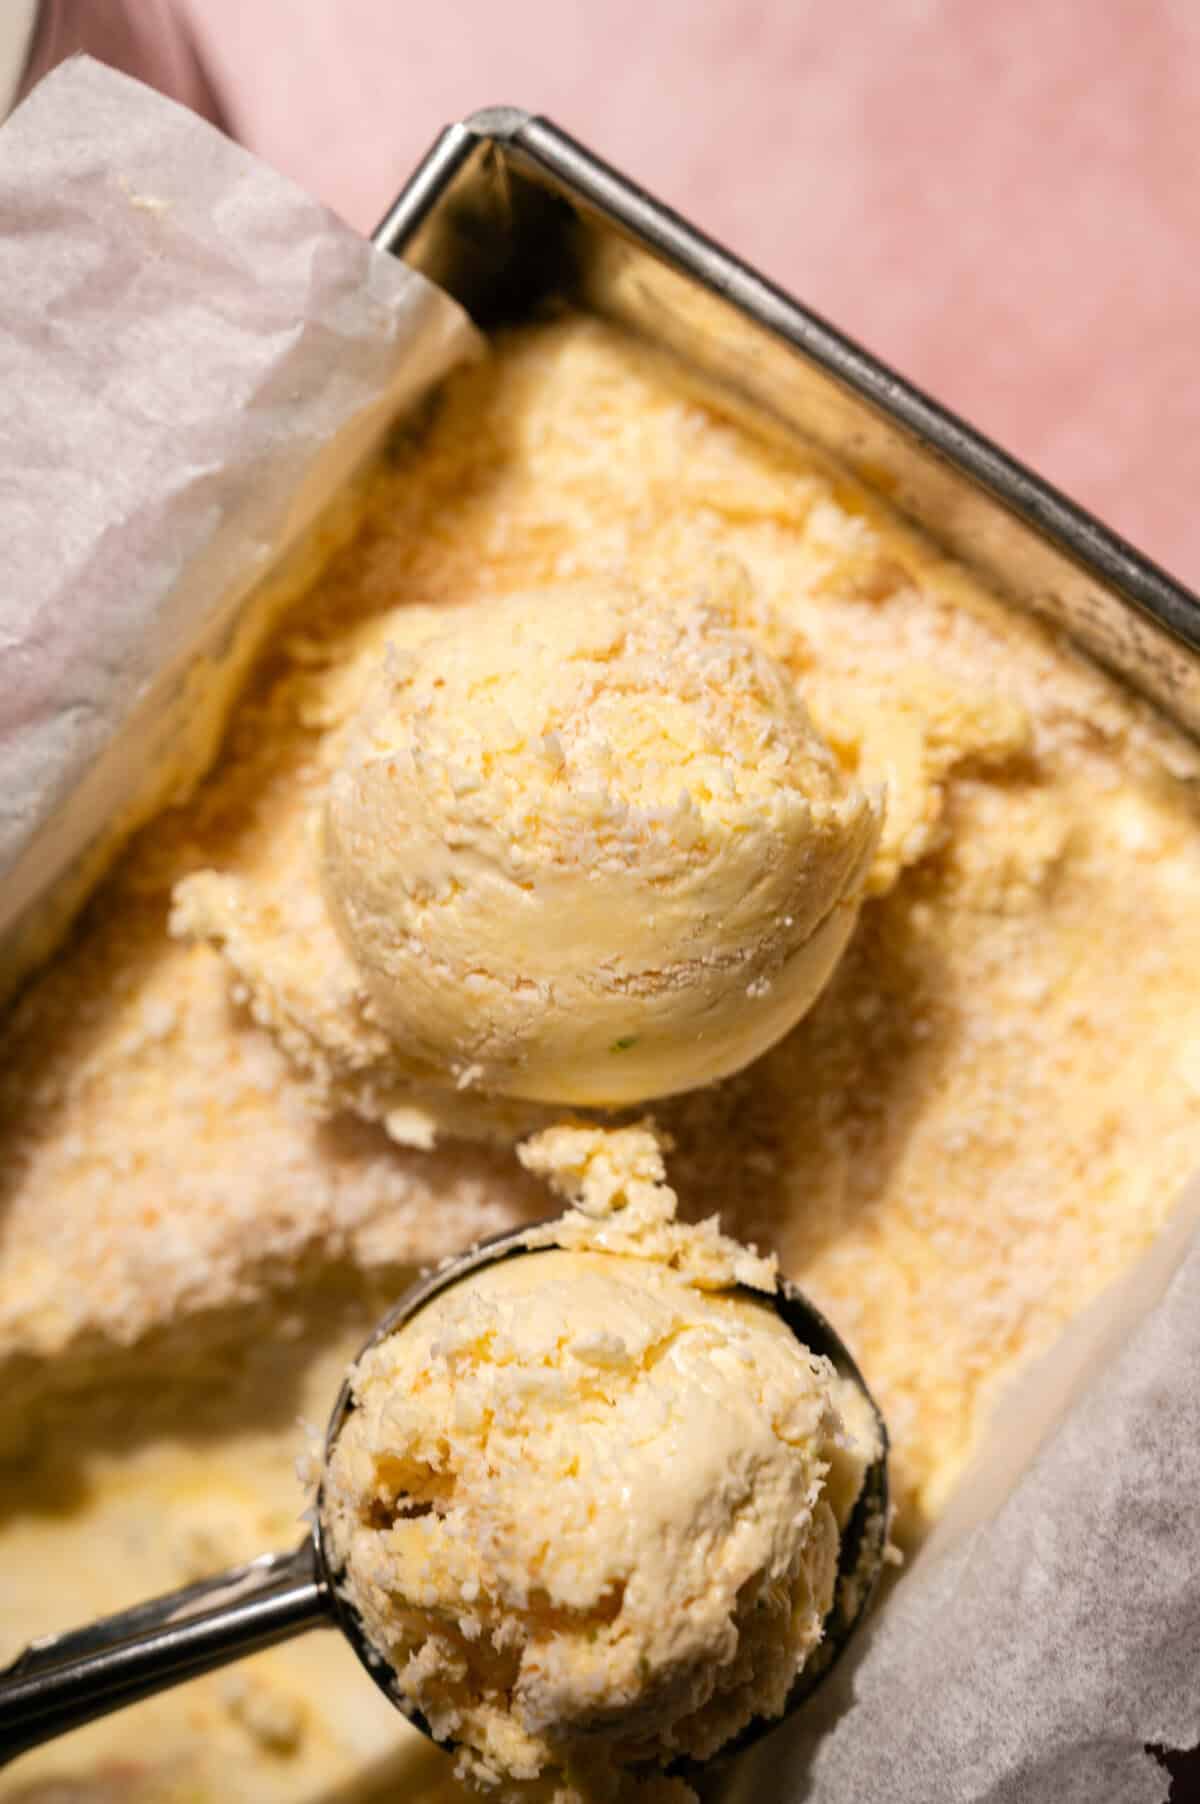
Cover the pan tightly with plastic wrap pressed against the surface of the ice cream, or seal with a lid. Freeze for 6 to 8 hours until completely firm. Before scooping, let the pan sit at room temperature for 5 to 10 minutes so the ice cream softens just enough for clean, even scoops that reveal the toasted coconut ribbons running through the layers.
Storing
Store tightly covered in the freezer for up to 2 weeks. Press plastic wrap directly against the surface of the ice cream before sealing to prevent ice crystals from forming on the top layer. If the ice cream becomes very firm after extended freezer time, let it sit at room temperature for 8 to 10 minutes before scooping rather than forcing a scoop through it frozen solid.
Frequently Asked Questions About Coconut Mango Ice Cream
Do I need an ice cream machine for this recipe?
No. This is a no-churn ice cream recipe that uses whipped cream instead of a custard base and requires no machine at all. The whipped cream provides the airy, creamy texture and the sweetened condensed milk prevents the ice cream from freezing into a solid block. The result is genuinely creamy and scoopable without any special equipment.
How do I get coconut cream from a can of coconut milk?
Refrigerate a full-fat can of coconut milk overnight or for at least 4 hours. The thick coconut cream will separate from the liquid and rise to the top of the can. Open the can without shaking it and scoop out the thick cream from the top. The remaining liquid can be used in smoothies, soups, or curries. Make sure you’re using full-fat coconut milk rather than lite, which doesn’t have enough fat content to separate properly.
Can I use frozen mango instead of fresh?
Yes. Thaw the frozen mango completely, drain any excess liquid, and blend until completely smooth before using. Fresh ripe mango has a more intense, fragrant flavor than frozen, but frozen mango is a reliable and widely available substitute that produces an excellent result especially when fresh mangos aren’t in season.
Why does the heavy cream need to be cold?
Cold fat whips more easily and holds its structure better than warm fat. The fat globules in cold cream bind together when whipped, trapping air and creating the foam structure that gives whipped cream its volume and texture. Warm cream has fat globules that are too fluid to hold together properly, resulting in a thin, loosely whipped cream that won’t provide the structure needed for no-churn ice cream.
Coconut Mango Ice Cream with Toasted Coconut Ribbons
Ingredients
Instructions
- Toast the shredded coconut in a dry skillet over medium heat, stirring frequently, until golden and fragrant. Watch it carefully as it can go from golden to burnt quickly. Set aside to cool completely.
- In a large bowl, whisk together the sweetened condensed milk, mango purée, vanilla, salt, and lime zest until smooth and well combined.
- In a separate chilled bowl, whip the cold heavy cream and coconut cream together on medium-high speed until soft to medium peaks form. The mixture should be thick and airy but not grainy.
- Gently fold the whipped cream into the mango mixture in 2 to 3 additions using a spatula, stopping as soon as no streaks remain to keep it fluffy.
- Pour about one third of the ice cream base into a loaf pan or freezer-safe container and smooth into an even layer. Sprinkle a thin, even layer of the cooled toasted coconut over the surface.
- Repeat: add another third of the base, then more toasted coconut. Finish with a final layer of base and a light sprinkle of coconut on top.
- Cover tightly with plastic wrap or a lid and freeze for 6 to 8 hours until firm. Let sit at room temperature for 5 to 10 minutes before scooping.